Changing Switch Colors
For those who have wondered... it IS possible to change the bulbs in the switches.
www.superbrightleds.com has direct replacements. Neo3 fits the passanger switches(window AND door), and the door lock switch on the driver's side. Neo4 fits the driver's side. I'll show how to do these, the power mirror switch has a whole different setup that i haven't played with yet. --------------- Passanger Side Panel  Back side 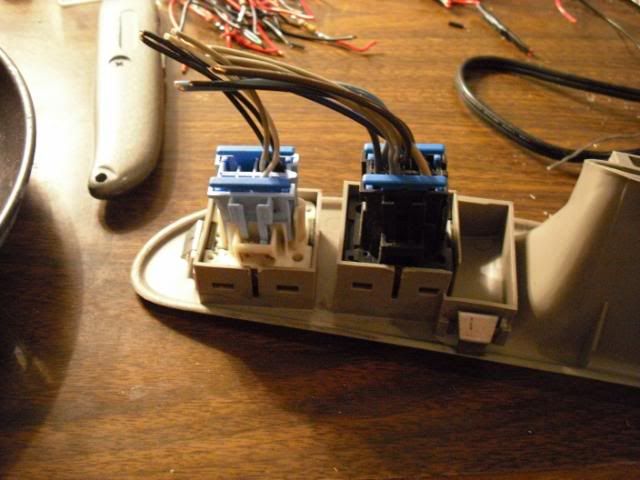 Remove wire harnesses. The bulbs are the blue circles in the center. 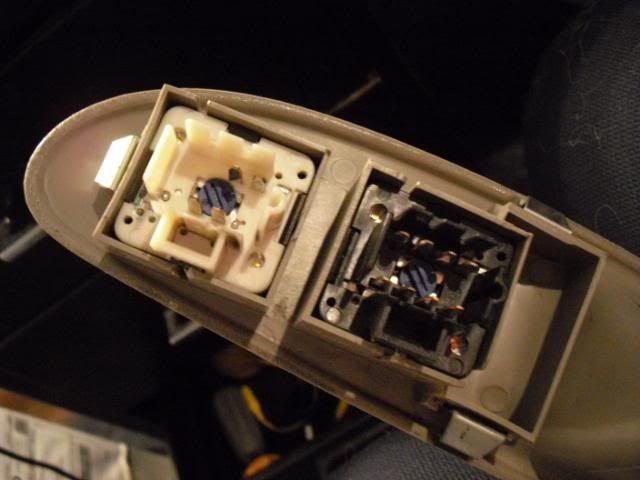 Twist the center ridge slightly and the blue bulb holder should pull right out. 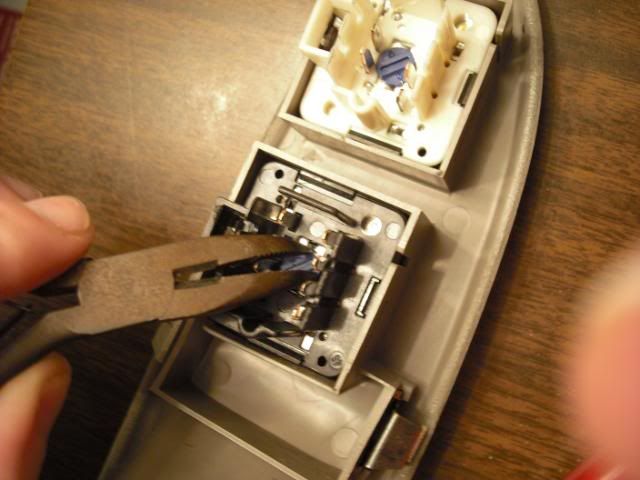 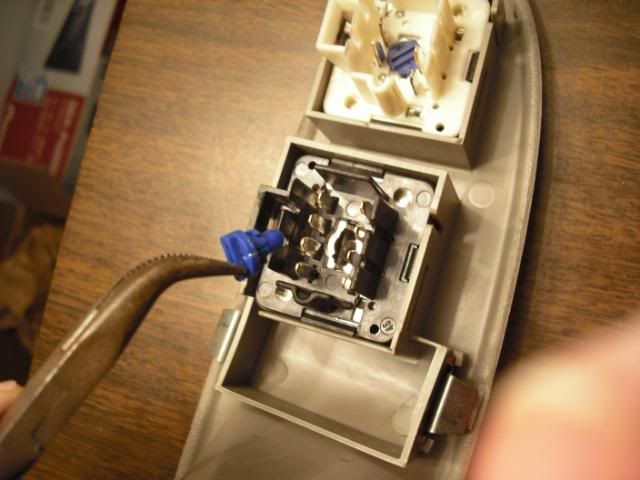 This is the new bulb compared to the old one. The tip still needs to be sanded down about 1/8", in order to fit correctly. 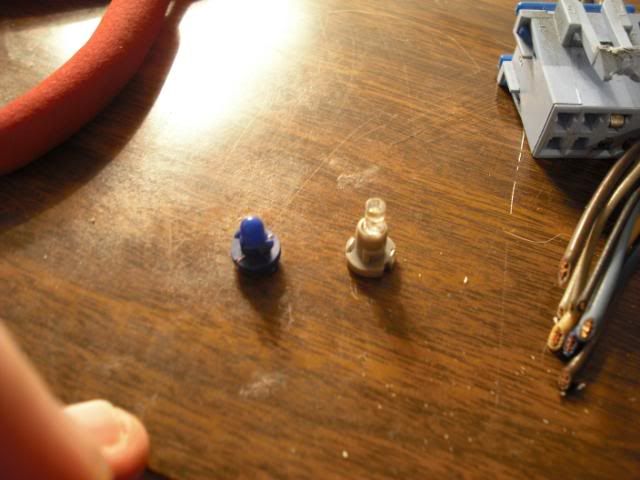 Drop the new one into place and twist to secure. These ARE POLAR. So if it doesn't work.. pull it back out and put it back in the other way. 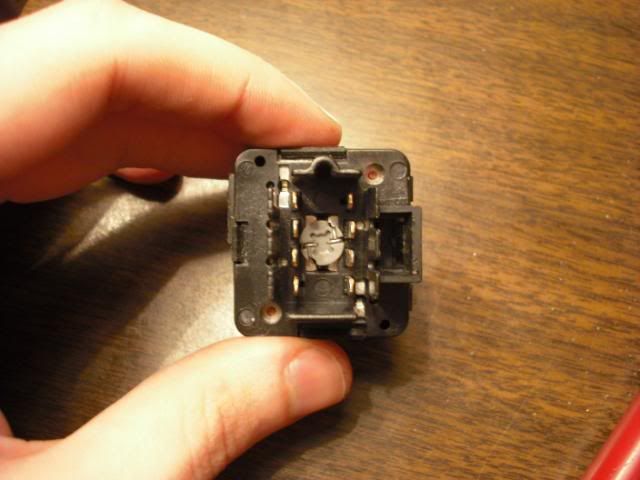 ------------------- Driver's Side. This one is a bit trickier.. but still ridiculously easy. 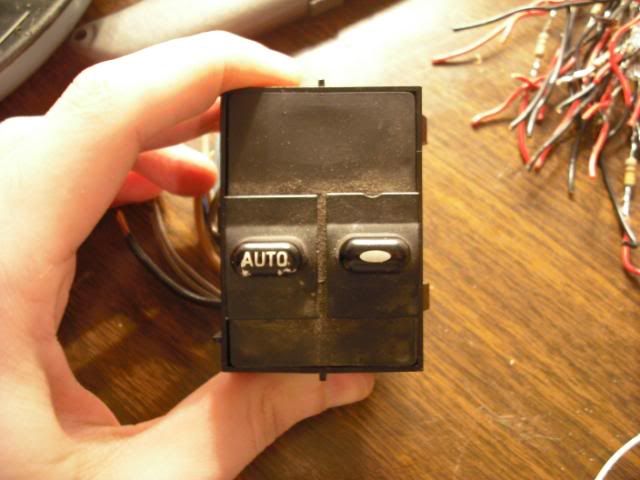 Back with harness removed 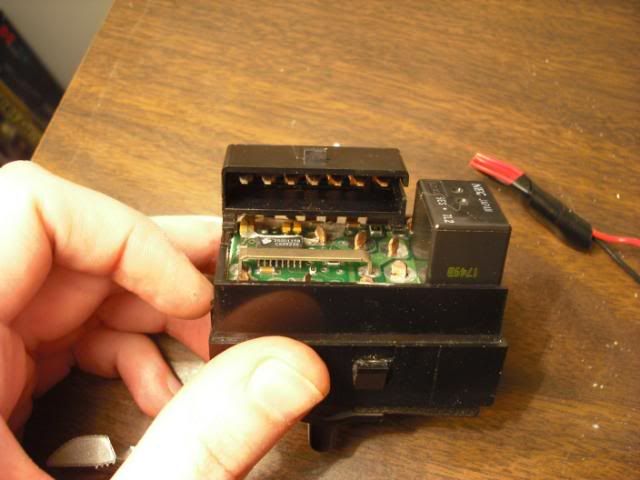 Note the copper contacts. (espicially the one behind the big black relay, you won't see that in later pictures. just remember its there) 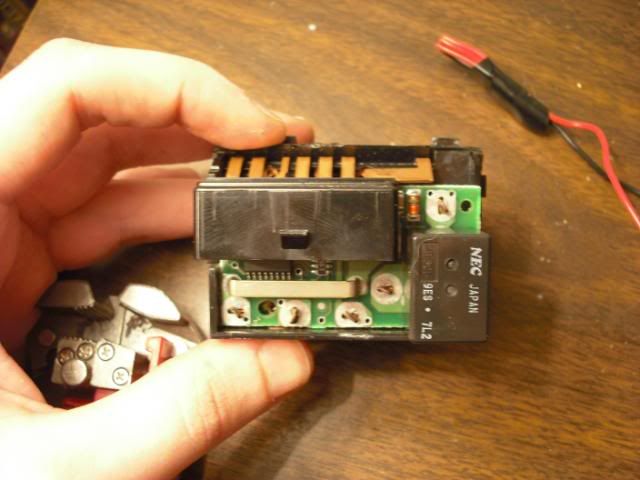 Notice the copper contacts are twisted. You will need to untwist them. A good pair of bent, needle nose pliers work great. A quick 1/4 turn, just to line them up with the slits under them is required. Red are twisted, Blue are straightened. The contacts don't all line up the same way, with each other. Just look at the slits under it and line it up accordingly. 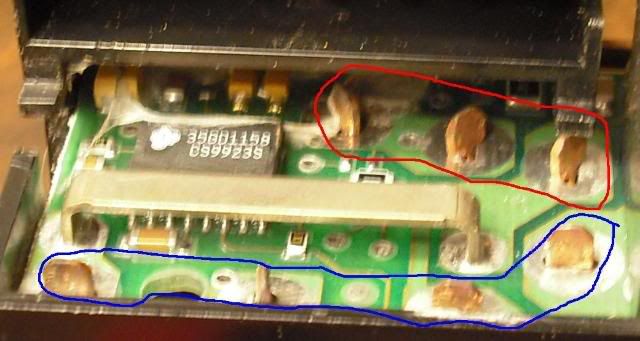 Now pry up lightly from the corner behind the relay, and the spot pictured below. 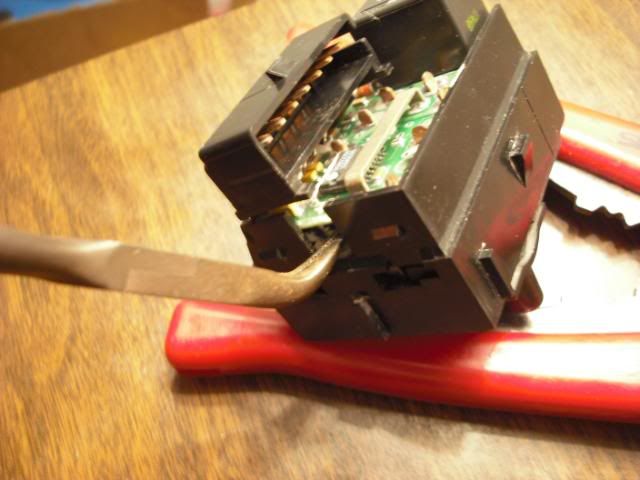 It should look like this after prying 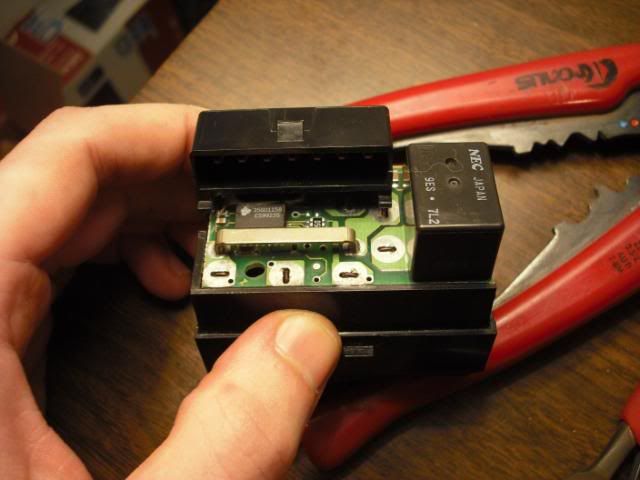 and now pull the board out  With the board removed, you should be able to access the bulb hidden below. Twist out, insert the new one. (new one is already in place)  Re-assemble. Be sure the board is as low as possible when you retwist the metal contacts to hold the circuit board down. These seem to also be ground contacts since they have metal contacts on the board. Be sure they contact those, again. for this (for a couple) you'll need 3xNeo3 and 1xNeo4. |
nice hand... err, i mean... nice how-to.
|
:ohmy: wow, very good chris!
|
Quote:
boredom doesn't sit well with me.... |
Quote:
but you help us, it matters:) |
i think i could pull this off, no resistors
|
pics at night or ban ;)
|
Ever played witht he radio bulbs?
|
cool, cant wait till the mirror switch how to.
|
looks like something I will have to do. nice write up. how many of each will i need to buy for a four door? I plan on doing the front and back doors.
|
Im glad someone's still working on different mods:P THIS SHOULD BE STICKIED:D
|
Quote:
if you take the switches out, update the thread with how many a 4 door needs. i only have access to my 2 door. |
Quote:
I was thinking the same thing too... Thats a very funky thumb:lol: Oh god that sounds weird:eek: :p |
It's my flat left thumb... The nail is trapezoid shaped(flat across the top) for reasons unknown. I've never crushed it...too bad
|
it's cuuuuuuuuuuuuute
|
Nice write up!
|
Quote:
I try to keep things as easy as possibly |
Well if someone has trouble doing that then they are a complete ass.....please no one take that offensive yet..I like to pay it forward..saves me time later....LOL:lol:
Again good job! I wish we could im bed video, or maybe have like a video how to on aleromod.com upgrades. |
It looks like they have NEO4 in white, but not NEO3 in white. Either I'm stoopid or they are ghey.
|
I just ordered last week... Mine are all white... :huh:
|
Hrm....I'm looking at the order page and the drop down menus show Red/Amber/Blue/Green for 3/4/5 and white for 4/5
|
odd. maybe i got the last ones! :lol:
i'd email them.. they are probably just temp outta stock. |
Started this project today and got the front pass side done. looks great. didn't get to driver side, will work on it tomorrow.
on a side note, on a four door the back two door window switches don't light up. found this out after taking them apart and not finding a light. :dry: who knew they didn't light up. I guess I never looked. |
Maybe a bit off topic, but does the bulbs in the HVAC controls are the same or are they soldered on the board?
|
i'm pretty sure they are soldered in. i looked once, and decided it would be WAY too complicated for me to attempt. :lol:
|
they are soldered in, i was in there the other day.
|
well finished and a four door is almost the same as a two. I also looked at the mirror switch and it looks like it has a bulb soldered in.
|
for real, who is your manicurist?
|
:lol: i chew my nails, quite regularly. but they've been getting a regular dosage of formaldehyde lately... so maybe its deteriorating my dead skin??
the window mirror bulb IS soldered in. I gotta fix mine (replaced it w/ led and the switch stopped working) the only way i've figured out how to get it to work, is to put the led in its place (make sure you get the +/- right) then cut the gray wire going into the hardness (few inches back) and put a resistor on that line.... since it powers the switch light. i tried putting the resistor in under the rubber seal... and it failed. (tried like... 8 different versions of a similar setup.. all failed) |
what size LED did you use and what size resistor?
|
standard 5mm. 470ohm resistor w/ white/blue. 920 w/ red.
|
thanks
|
Finally got around to trying this today. Which gray wire? I saw that there are two gray wires.
|
if your looking AT the end of the plug. (at the female end, with the clip at the bottom)
(i think there are 5 pins.) 1-2-3-4-5 6-7-8-9-10 i'm almost positive its #5. With the clip at the bottom, its the one in the top right. |
Awesome guide. One question, is it necessary to cut all the harness wires or can you just disconnect them to the same effect?
|
woah... wait... why are you cutting any harness wires!?!
|
Quote:
Thanks! |
can you just substitute regular leds for this and not use 194 leds? im too damn poor for them :(
EDIT: i found them, they are decently cheap, lol, do those nails taste good? nom nom nom :p |
i don't eat them... just chew them, so they aren't long!
and what are you talking about nate?? these defintely aren't 194 bulbs. Neo3 are MUCH smaller then that. 194 = gauge bulbs Neo3 = Switch bulbs. |
Quote:
In the pictures it looks like the harnesses were cut so you could bring them inside, or was that an extra switch you were working on? |
| All times are GMT -4. The time now is 02:11 AM. |
Powered by vBulletin Version 3.6.0
Copyright ©2000 - 2024, Jelsoft Enterprises Ltd.