100 leds and alot of free time..............
1 Attachment(s)
here are pics of what ive done so far this week (4 months 3 weeks to go).
glow needles led arrows in the side mirrors. behind the glass cant see them when they are turned off. getting diff resistors so the light up brighter. Got the idea from cav06 and his led turn signals. think third brake light/turn signals is next want two rows of leds bottom left/right turns top brake. . |
wheres the how to? use used 3mm?
and in process pics? gah! you've been here long enough to know the rules for led work! :lol: needle looks nice. how did you manage that one? and i'm not a HUGE fan of putting leds on/behind the mirror.... but at least its even. nice job. ...but those are mounted behind the lens, and still show that much? hmm... i guess backlighting the mirror w/o it showing through, except on the outer edges would be tricky then... |
looks good bro how long did that take? and howto
|
Nice job and love the gauge needle
|
how to is coming. remember i only can type wit one hand. i will do it to night.
used 3mm leds 3 leds under big needles and 1 under small. all i can say is precision drilling. the arrows have 15 leds in them each only have one done. boy my wife is regreting setting up a table in the basement for me to work. im like a celler dweller. one mirror took me 4 hrs. needles took about the same. i went back and added 1 led to the big needles. if you lay them out right the needle gets brighter as the speed and rpm goes up . the arrow pic is before i put the new resistors in now the leds are the same brightness |
needle getting brighter shouldn't matter... maybe when the car is idling they are a slight bit dimmer (alt not putting out full power) but anything over like 2k rpm shouldn't matter.... :huh:
and the pic is 2x3mm on the needle, then you added one? or 3, and you added a 4th? |
needles look nice, you know you can take an led third brake light from an impala and it snap it into place in our cars, it's a little easier and less tedious.....
|
You'll have to show me how you got them to show through the mirror... I did it through the side (in between the mirror and housing.
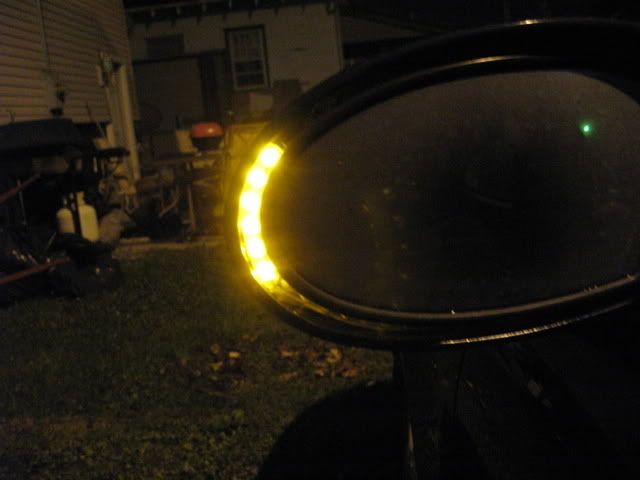 Mine are more orange in person, wierd lighting outside made them look yellow with my camera.. |
Quote:
it is because of the position of the leds that the needle gets brighter. had 2 added the 3rd |
Quote:
ye that would cost money. im off work for 5 months so time is all i got. and i want turn signals in the third brake light. and they don't do this:  |
Quote:
drill holes in the plastic behind the mirror with a flat bottom drill. don't drill thru mirror. then mount leds hot glue them in wire and done. |
Where do you put the LEDs for the glow needles i dont see a place to put them. What all has to come off.
|
Quote:
the best way to put it is everything has to come apart in this order back cover front "glass" circut board front gauge face ( slowlly pry it and let th glue release work al the way around slowly it is only plastic ) remove the gauge "motors" label them (don't know if it matters but i did" drill #12 holes at 9/3 and 12 o'clock then go and redrill # 33 hole ( .116 ) 3mm leds are .115 and drill the hole on the small gauges at 3 o clock. ( looking from the back ). place the leds in the holes ( conecting them in series + - + - .... ) solder the leds together the final result should be three leds in a circle about the size of a AA batery. with a positive and negitive lead. take a hack saw blade and put two groves in the plastic around the gauge "motor" so there is a place to run the wires. after pressing in the leds.and pushing the wires in the dished area. take hot glue and glue the leds in and cover the wires with glue to insulate them from the gauge "motor". contiue till all 4 gauges are done. then solder a resistor (220 ohm 1/4 watt for 3 leds) to the positive side of the series curcit. then chain all the curcits together and come out of the cluster at the bottom center. using hot glue to attach the wires. i recomend testing the leds thru out the process to make sure that every thing is working. i use a power wheels charger as my 12 volt power. for those who don't know the neg side of an led is the short lead or the flat side of the led base. |
you wouldnt happen to have pics on how you did it?
|
GOOD effn job!!!
|
yalero, not ALL leds have neg on the short side. i got some ebay reds, that were reversed. its best just to check them before mounting. (hold a resistor to either side, and test w/ 12V)
|
glow needles freaking own.
|
Quote:
i will get some. i have to rip the whole gauge apart again :cry: . but for u guys i will. i have nothing better to do :yahoo: :yahoo: ;) WILL POST PICS WITHIN THE HOUR |
Quote:
true !! the flat side is neg to. led bases are shaped like a " D " |
pictures are here click on description:
this is the peice the wires have to stay below leds from the back general lay out front gauges i put my leds at 6/9/12 oclock recomend 9/12/3 bring wires out at bottom this is where i got the leds 100 3mm red for 6.99 shipped and i had them the next day. ordering 100 5mm red for the third brake light project. and 100 blue for accsent lighting |
| All times are GMT -4. The time now is 02:23 AM. |
Powered by vBulletin Version 3.6.0
Copyright ©2000 - 2024, Jelsoft Enterprises Ltd.