Led Gauge Cluster
Since so many people have asked...
If you can't get your gauge cluster out... DON'T DO THIS MOD. With that being said, here we go... Materials: A small screw driver Soldering gun Needle Nose pliers 5 flat tipped Leds (in these picture i just used one i laying around. it IS NOT sanded) 5 resistors (appropriate ohm to work with 12V) Two colors of wire (optional) 1) This is what your circuit board should look like. The one pictured just has all the lights removed, except one. (the shift light strip is kinda pointing to it, its on the middle right. 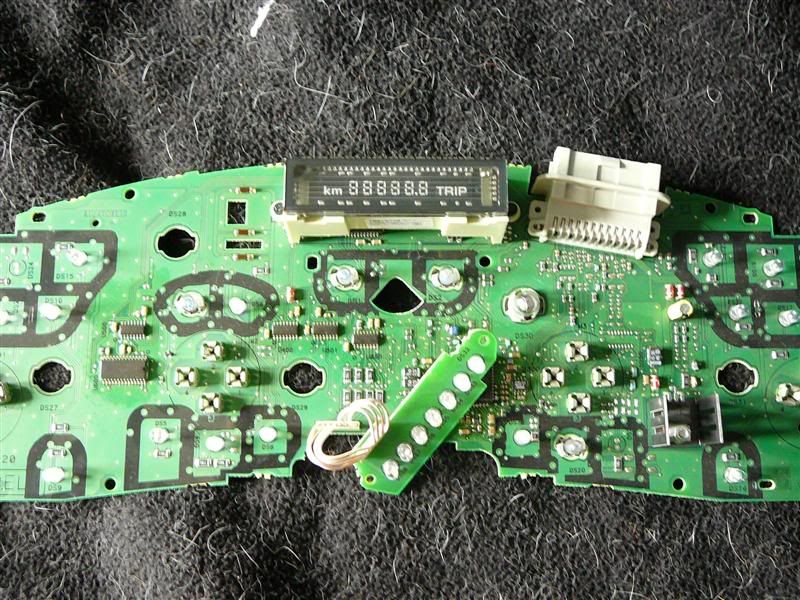 The back picture below, is what your going to be looking at the most. Ignore the little ones, those are hazard lights. The bigger ones are the gauge lights. They just twist, and pull out. 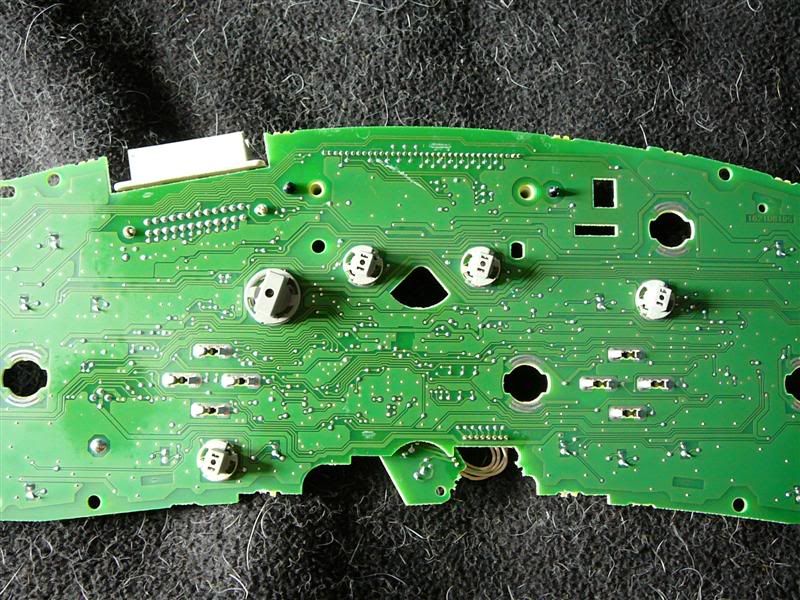 2) With your light removed, push the little tabs so they are facing up. This will help at a later step. 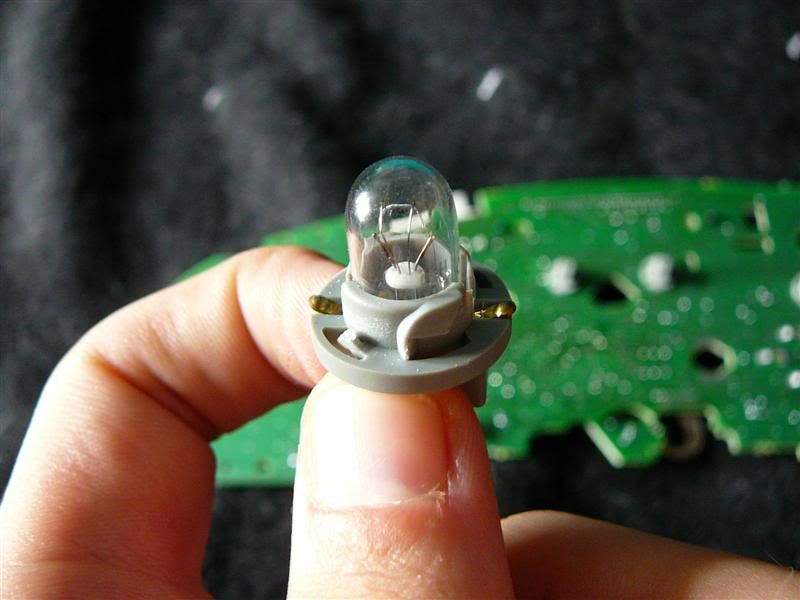 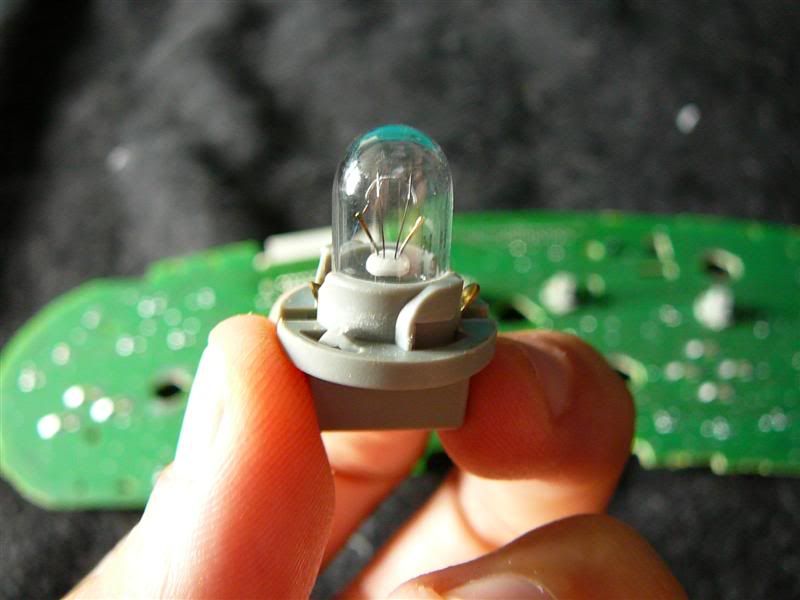 3) Push the light out from the bottom with the screwdriver. A little pressure is needed, but it'll just slide right out. 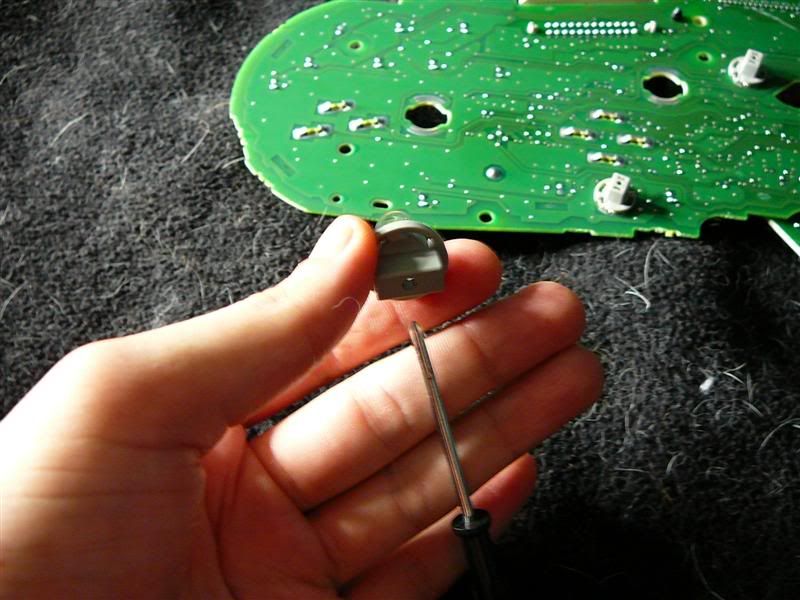 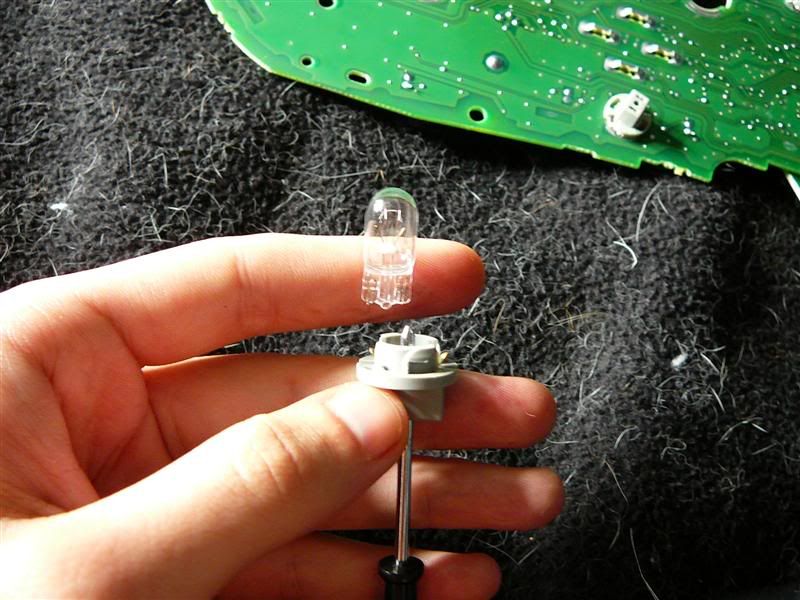 4)Now you can see the little clips that were connecting the light. Use the needle nose plyers to remove the metal clips. With the tabs folded up, you have something to pull on. Slightly more pressure then it took to remove the light, is needed. This is where i will branch off and split this How-To into two different methods... 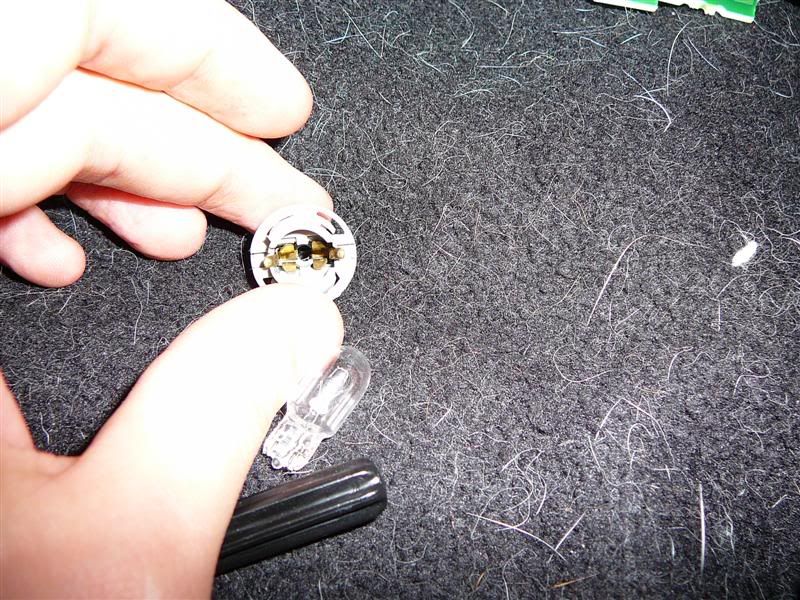 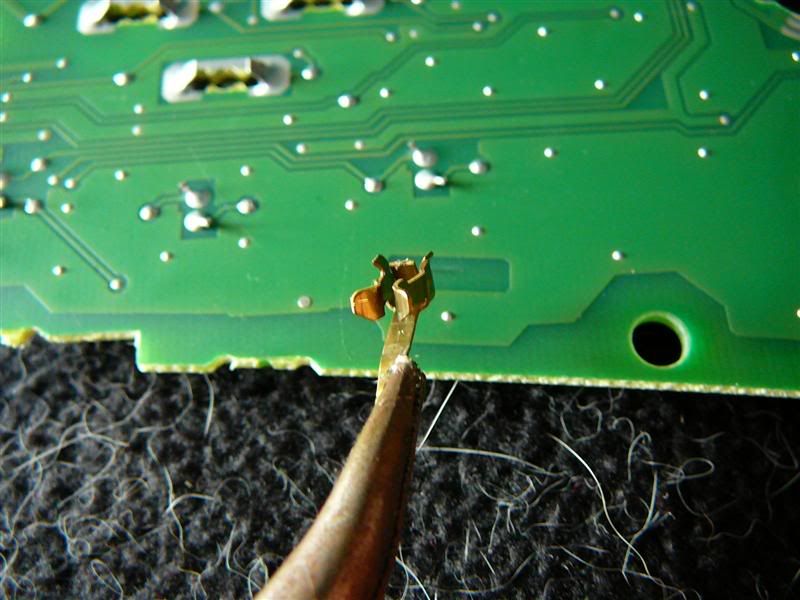 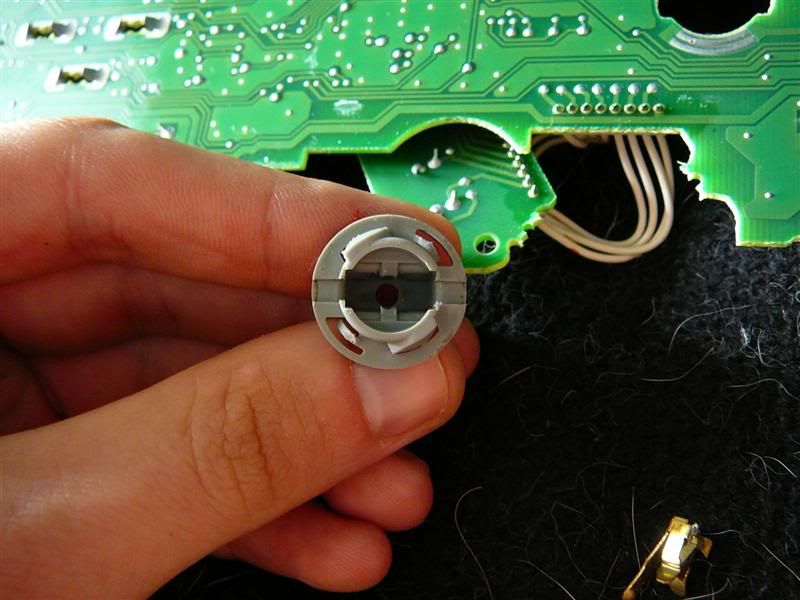 Method A 5a) You can bend the leads on the led to put them out each side. You will need to cut one lead (either one, it doesn't matter) and solder the resistor on BEFORE the metal leads go out of the gray twist in connector. THIS IS NOT SHOWN IN THE PICTURE, I did not use this method, so I don't have any experience with it. It can be done, however. 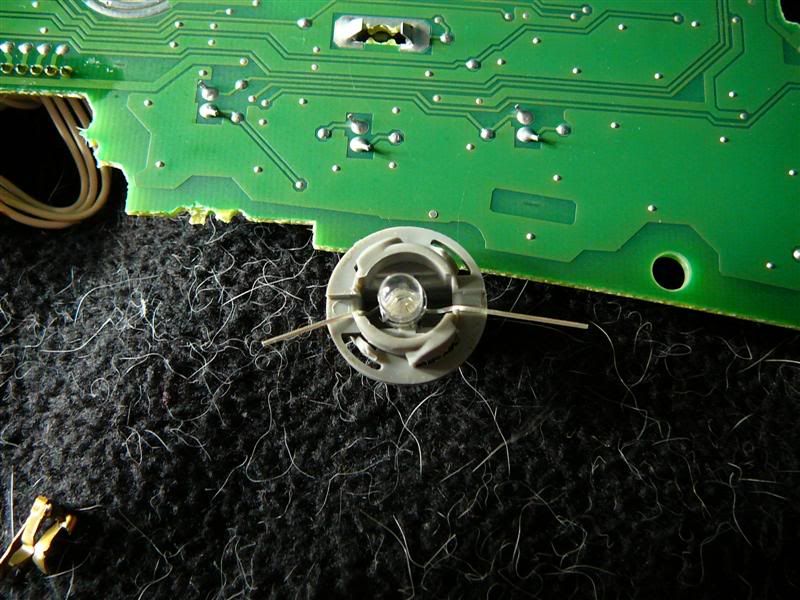 6a) Get the Led into the right form, so the leads fit out the connector, but do not touch each other, inside of it. Remove the led/resistor and put some silicone or hot glue down into the connector, then reinsert the led/resistor. This will keep the connectors from shorting, and hold the unit in place. (since the led is smaller then the old bulb) 7a) Now you can simply twist the connector back in. Just make sure the glue/silicone is dry, trim the leads so they aren't sticking out really far, and make sure the leads are touching the metal strips around the rim of the connectors slot. IF your led doesn't light, its either a bad lead to strip connection, or a polarity problem. Take it out, and twist it in the other way, from what you just had it. Method B (Method I used with 2 different color leds in the connector) 5b) Test your led and figure out which lead is your ground. (or negative lead) Bend the positive lead and slide it out one side of the connector, while the negative goes out the bottom hole, you just used to push the old bulb out. 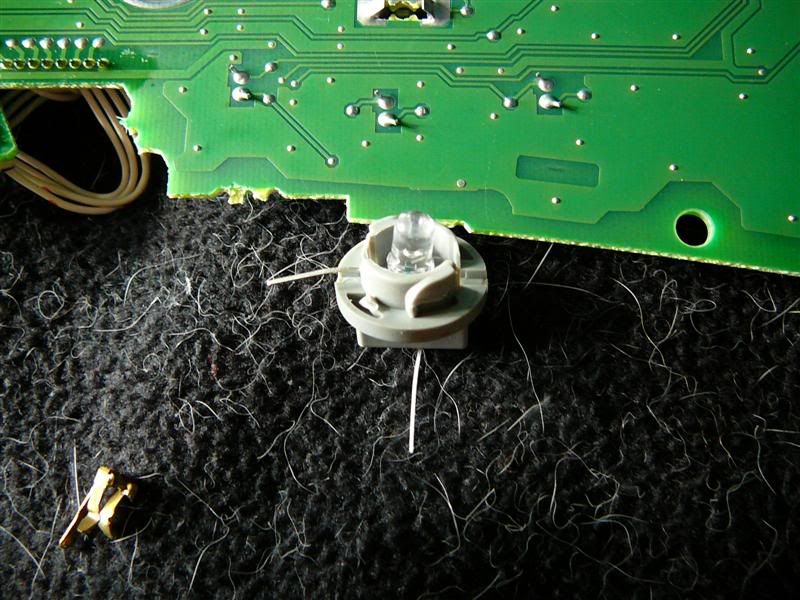 6b) Follow the same steps as the last method, to secure the bulb in place. (silicone or hot glue) 7b) Solder a wire to each lead. Do Not Touch your Circuit board with the Soldering Gun! That would be bad, and you risk destroying important connections. 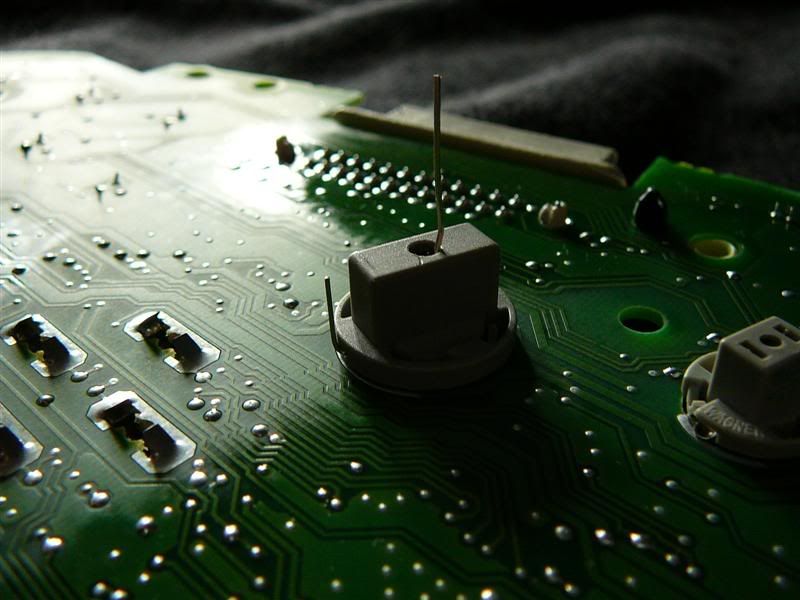 8b) Run your ground wires to a small distribution block (so you only have to connect them to a single ground) And repeat with your Positive wires. I connected those wires to a small distribution block I have connected to the wires on my center console cubby lights. That way your gauge cluster turns on at night, when your headlights do. |
very nice write up.
|
Nice, but you can do this so much easier if you buy LEDs that are 194 Inverted (can find them on ebay for pretty cheap). They are a direct plugin on the light, just remove the old glass ones from their housing and plug back in. If you get 12V ones there is no need to solder a resister to it either, have mine done in blue and it took me 20 mins to do. Very easy and extemely noticable.
justin |
...but you can't do 2 color with that method. :p
|
Sure you can, just get two different colored bulbs. They sell them in many colors, just get a replacement LED that fits your need. I haven't changed all mine just yet, only the bigger lights, and they work great. Look at various ebay auctions for http://cgi.ebay.com/ebaymotors/10-pc...spagenameZWDVW
check it out. unless I am completely confused, this should work. |
yes. they work.
|
Quote:
i know they sell various types, but i have one of each color (red/blue) led in that bulb holder. how are you going to fit one of each 194 bulb into that holder? as well as wiring would be a pain, since they connect differently then led. if your doing a single color, hell yes buy the led replacements. its MUCH easier. But some members have alot of left over leds, and wanted a "how to" so they can use up, product they already have on hand.... |
I have the white face gauges on my car which are pretty bright but i can't see my needles too good. if i replaced these bulbs with red led bulbs would my needles glow red?
|
yes, or you can do what a fellow member already did, and take the needles out, drill tiny holes in the bottom and put a couple micro leds in them.
|
ya i read that but i would probably screw something up doing it that way.
|
/\ that was me and its not that hard just have to take your time and DONT rush it let me know
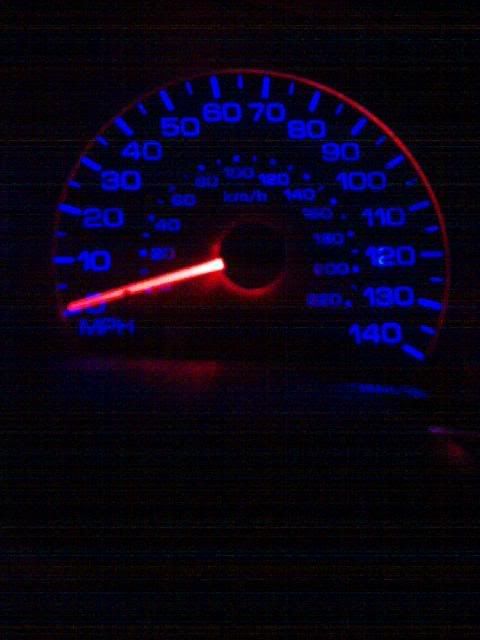 |
just those five gray ones light up the speedo and stuff? i don't know anything about leds. if someone shows how to wire them up that would help alot of people like me. also YALEROYNOT how did you do that with your needle? thats exactly what i want for gauges cuz it would look nice with my ractive blackout gauges
http://www.canadiantire.ca/browse/pr...08474396672478 |
Quote:
look here : http://www.aleromod.com/forums/showt...t=glow+needles |
are all of the bulbs back there 194 bulbs?
|
in the picture, is it the stock gauge background cuz mine is kinda greenish so i never changed to leds cuz i didnt know if it would turn out right through the green.
Is there a tutorial on how to remove the cluster and circuit board? Thanx |
someone on site figured out that the green is only a film, and it comes off.
and if you just look... you should be able to easily figure out how that board comes out. everything snaps together, so therefore, it must just snap apart. i've taken mine out a couple of times. its really easy. (that one is a spare i have sitting around. donated by albinomonkeyrat) |
LOL ,
When i sit in drivers seat ... (NOOBY) i still dont get where to pull to unsnap cluster |
step 1: Remove the two bolts above the speedo/tach gauges, that are inside the bezel that surrounds the entire gauge assembly.
step 2: Remove the bezel. step 3: Remove the 4 bolts that hold the entire gauge assembly in place. (on in each corner) step 4: pull gauges, out, and disconnect wire harness in the top right corner |
can that create problems with the needles of my gauges
I think i ve heard that somewhere |
removing the needles.. yes. but you don't need to go that far in, to put in led bulbs.
just gotta get to the back of the board, which is easy to do. |
| All times are GMT -4. The time now is 08:58 PM. |
Powered by vBulletin Version 3.6.0
Copyright ©2000 - 2024, Jelsoft Enterprises Ltd.