|
View Poll Results: Who is willing to pre-pay for a mount or two (not know but soon)
|
|
Im down to pre-pay
|
  
|
3 |
50.00% |
|
im down but low on funds (Matt is willing to help out some members if low on cash)
|
  
|
1 |
16.67% |
|
Sorry but I cant pre-pay
|
  
|
2 |
33.33% |
 06-13-2010, 11:19 AM
|
#61
|
|
GX Member
Join Date: Apr 2010
Location: Houston, TX
Posts: 48
|
ITS DONE AND I MUST SAY IM F*&%ING HAPPY WITH THE WAY IT CAME OUT
I wrote a how-to and will post it tonight once i get off of work
And once again thanks TTR and Aaron for making this amazing product
THE REVIEW
Product - Amazing
Installment - Semi-easy (will require two ppl to help align the motor correctly)
Intallment Time - 1 hr or less
Motor - Barely any movement (other than the normal vibs, also motor will lift about half a inch)
Test Drive - also no vibrantion felt, also no wheel hop and thats what really suprised me (*note - I have Kyb strut mounts, GR2 struts w AG Springs, Vibrant Strut bar, Ploy Stab link bars, and Ploy control arm bushing & A frame ploy bushing*) Also car shifted alot better and drove alot smoother, at high speed shakes and vibrantions basically disappered.
Overall - One amazing product that is doing a fantastic job plus one happy a** mexican with a malibu 
Ok guys im waiting for Aaron to e-mail me back (about posting the paypal link) and i will post the install tonight, cant wait till you guy get yours and you have them installed too
-MATT |

|

|
|
06-13-2010, 12:04 PM
|
#62
|
|
GX Member
Join Date: Jun 2010
Location: MN
Posts: 35
|
Just a note, this mount does not raise your motor any. It is the same height before and after the install of this product. Why it may appear higher? When you remove the stock mount, the engine slighly "falls", and when you install the new one, it appears to bring it up. However both mounts have the exact same install height.
Glad to see wheel hop is gone! |
|
|
|
|
06-13-2010, 12:07 PM
|
#63
|
|
A-mod Pirate
Join Date: Jul 2008
Location: Big Bad Cali
Posts: 3,016
|
these will still be available after this group buy right?
|
|
|
|
|
06-13-2010, 12:15 PM
|
#64
|
|
GX Member
Join Date: Apr 2010
Location: Houston, TX
Posts: 48
|
Quote:
Originally Posted by TurboTechRacing

Just a note, this mount does not raise your motor any. It is the same height before and after the install of this product. Why it may appear higher? When you remove the stock mount, the engine slighly "falls", and when you install the new one, it appears to bring it up. However both mounts have the exact same install height.
Glad to see wheel hop is gone! |
well like i said in the e-mail i was shocked to find out my motor mount was bad so i guess that where i saw a big difference in motor position |
|
|
|
|
06-13-2010, 01:23 PM
|
#65
|
|
GX Member
Join Date: Jun 2010
Location: MN
Posts: 35
|
Yes that could very well be That stock mount was very worn out. |
|
|
|
|
06-13-2010, 01:24 PM
|
#66
|
|
GX Member
Join Date: Jun 2010
Location: MN
Posts: 35
|
Quote:
Originally Posted by heineck
these will still be available after this group buy right?
|
Yes, but the price maybe a bit higher |
|
|
|
|
06-13-2010, 02:08 PM
|
#67
|
|
GL Member
Join Date: Apr 2006
Location: Torrington, CT
Posts: 734
|
woot woot... i want to use this on the track :P, gonna need the manual ones even if I have to drill them myself. waiting for paypal addy.
__________________
* 02 Gx 5-Speed - Supercharged *

|
|
|
|
|
06-14-2010, 02:01 AM
|
#68
|
|
GX Member
Join Date: Apr 2010
Location: Houston, TX
Posts: 48
|

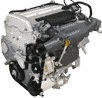
2010 Turbo Tech Racing N-Body Motor Mount How-To
*Special thanks to Aaron from TTR for the mount*
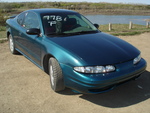
Vehicle: 2004 Chevrolet Malibu Classic
Tools you will need:
-A friend to help (will explain more in the install process)
-3/8 Ratchet
-3/8 Extension (One long one or two short ones)
-8mm wrench
-18mm socket
-15mm socket
-Jack (not in picture) **Will be used to lift motor**
-Piece of wood (incase your jack doesn’t go high enough)
-Car Ramps (not in picture....and if you don’t have car ramps you will need to jack up the front of your car with another jack)

Installment Time: 1 hour or so (depends on how long it takes you to align the motor)
Installment:
1. Drive vehicle up on ramps or raise front of vehicle
2. Disconnect Negative battery terminal (8mm wench)

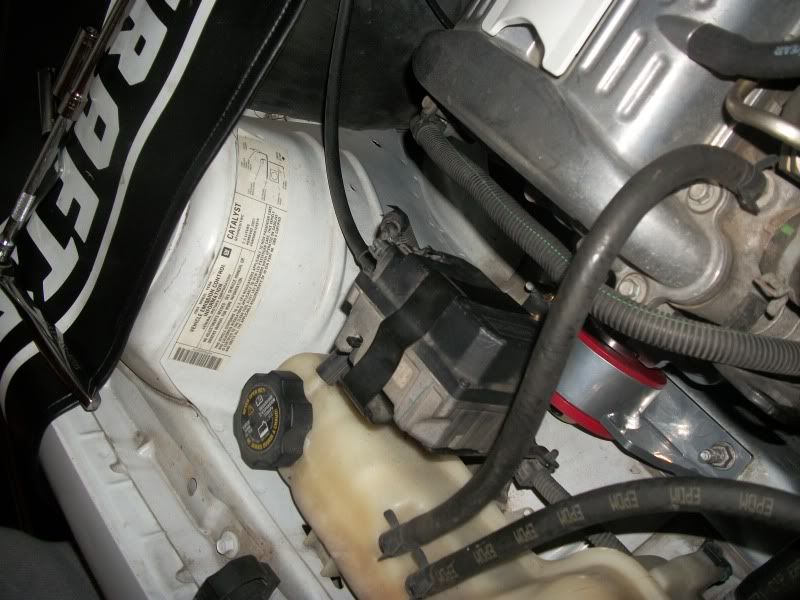
3. Locate the cruise control unit and disconnect the plug to the unit, now remove the cruise control unit by lifting up on the black clip at the top passenger side and pull the cruise control unit out and rest it on the valve cover out of the way, now push the black metal clip down to remove it so you have room to work on the mount.


4. Now go under the vehicle and place the jack under the transmission to support the motor and transmission


5. Grab your Ratchet, 3/8 extension, and 15mm socket and loosen up and remove the two nuts that are holding the motor mount to the body

6. Switch the socket so that you now have the 18mm socket w/ your ratchet and 3/8 extension and loosen up the bolts that hold the mount to the motor and remove the bolts

7. Pull the old motor mount out and replace with the new motor mount


8. Now screw down the two nuts that hold the motor mount to the body of the car
9. Now look at the bolt hole closest to the front of car and see if they line up with the motor hole. If not raise the jack that is holding the transmission so that the hole lines up and place the bolt in the hole, now tighten the bolt down and the mount and motor should align to where you can continue screwing the bolt in, now do not screw the bolt all the way down cause you will need to place the other bolt in before you can tight it up all the way,
10. Ok this is a check point right now ---- you should have the two nuts that go to the body tighten all the way down and the bolt closest to the front of the car about 80% all the way in, now look into the other bolt hole and see if the holes line up if not you will need your friend to slowly lower the jack as you watch to see if the hole lines up if its going the opposite way tell your friend to slowly raise the jack as you watch the hole (This process will take most of the time and be patient with this you do not want to strip your bolt or your block and the bolt that is in about 80% will be perfectly fine its just getting the other bolt lined up straight after you line the bolt up tighten the bolt down till it gets tight (about 25% in)(first hand tighten it then about 3-5 turns from ratchet) now you will have to tighten up the other bolt (the 80% one) all the way down and you will see the mount line up, now began tighten up the last bolt, you will get about 50% (4-5 turns from ratchet) in and the bolt will get tight like it doesn't want to go in anymore, but what you have to do is slowly raise the jack and you will then be able to tighten the bolt down about 75% (4-5 turns from ratchet) till it gets tight again now lower the jack slowly and tight the bolt till about 90% (5-7 turns from ratchet), now remove the jack from under the transmission and tighten up the bolt the rest of the way.
11. Now go over both bolts and make sure they are tighten all the way down you should be able to tighten up the one closest to the front a little and also go over the two nuts that mount the mount to the body (Torque specs: Two grunts and a fart)

12. Now replace the black metal clip and place the cruise control unit in the black clip and secure the black clip by latching it to the top, also reconnect the plug to the cruise control unit
13. Reconnect the negative battery terminal (8mm wench)
14. Lower vehicle from jack or ramps and enjoy your new polyurethane motor mount.  |
|
|
|
|
06-15-2010, 05:04 PM
|
#69
|
|
GL Member
Join Date: Apr 2006
Location: Torrington, CT
Posts: 734
|
bump for Invoice link.. I need this before July 9th.
__________________
* 02 Gx 5-Speed - Supercharged *
|
|
|
|
|
06-15-2010, 07:14 PM
|
#70
|
|
GX Member
Join Date: Apr 2010
Location: Houston, TX
Posts: 48
|
Quote:
Originally Posted by Vic28
bump for Invoice link.. I need this before July 9th.
|
I got a email from Aaron about the mount on how it is doing its still holding great just waiting to let the link go need appoval first |
|
|
|
|
06-15-2010, 08:14 PM
|
#71
|
|
GX Member
Join Date: Jun 2010
Location: MN
Posts: 35
|
Okay, here it goes:
Payment can be sent via paypal to:
AHarris_z24@hotmail.com
It will be $149.99 for the mount
$15.00 to ship to the lower 48 states.
$45.00 to ship to Canada Via USPS Priority Mail.
Once we hit 5 paid, the clock starts, we will have them shipped off within 3 weeks of 5 members paying.
ONCE YOU PAY, fill in on a line below, with your user name and the mount color and the bushing color.
Example: whitemexican/Polished mount/Red Bushing
1.
2.
3.
4.
5.
Last edited by TurboTechRacing : 06-15-2010 at 08:16 PM.
|
|
|
|
|
06-15-2010, 08:26 PM
|
#72
|
|
GL Member
Join Date: Apr 2006
Location: Torrington, CT
Posts: 734
|
ONCE YOU PAY, fill in on a line below, with your user name and the mount color and the bushing color.
Example: whitemexican/Polished mount/Red Bushing
1. Vic28/Polished mount/Red Bushing - paid $164.99
2.
3.
4.
5.
__________________
* 02 Gx 5-Speed - Supercharged *
|
|
|
|
|
06-15-2010, 08:36 PM
|
#73
|
|
GL Member
Join Date: Oct 2009
Location: Wichita Falls, Texas
Posts: 663
|
ONCE YOU PAY, fill in on a line below, with your user name and the mount color and the bushing color.
Example: whitemexican/Polished mount/Red Bushing
1. Vic28/Polished mount/Red Bushing - paid $164.99
2. Malibu369258/Polished mount/Red Bushing - paid $164.99
3.
4.
5.
|
|
|
|
|
06-15-2010, 09:31 PM
|
#74
|
|
Premier V.I.P. Member
Join Date: Feb 2009
Location: Oxbow SK
Posts: 1,385
|
ONCE YOU PAY, fill in on a line below, with your user name and the mount color and the bushing color.
Example: whitemexican/Polished mount/Red Bushing
1. Vic28/Polished mount/Red Bushing - paid $164.99
2. Malibu369258/Polished mount/Red Bushing - paid $164.99
3. Colonel6632 /Polished Mount/Red Bushing - Not Paid Fully - $100 cad
4.
5.
sorry guys, but since i don't have a credit card, i have to wait for paypal to accept my funds, and that takes seven days. this is what i had in my account. i sent that, and will send the rest asap! i am good for my word, and hopefully by sending a hundred so far, they'll see that
__________________
2002 Alero w/ 2.2 ecotec 5 speed
power window conversion, heated leather seats, 16" rims, high & low hids, auto dimming rear mirror, speedbuilt front and rear sway bars, poly bushings all around.
2005 Silverado 2500HD w/ 6.0l Vortec 4L80E
Tuned 6.0l, exhaust, intake, with 450000km on the odometer. Tow Rig
1985 Pontiac Trans Am GTA w/ 5.7 Vortec 700r4
mild vortec 350 with 4 speed auto. performance suspension. factory gold color. project car
|
|
|
|
|
06-15-2010, 09:33 PM
|
#75
|
|
GX Member
Join Date: Jun 2010
Location: MN
Posts: 35
|
Quote:
Originally Posted by colonel6632
ONCE YOU PAY, fill in on a line below, with your user name and the mount color and the bushing color.
Example: whitemexican/Polished mount/Red Bushing
1. Vic28/Polished mount/Red Bushing - paid $164.99
2. Malibu369258/Polished mount/Red Bushing - paid $164.99
3. Colonel6632 /Polished Mount/Red Bushing - Not Paid Fully - $100 cad
4.
5.
sorry guys, but since i don't have a credit card, i have to wait for paypal to accept my funds, and that takes seven days. this is what i had in my account. i sent that, and will send the rest asap! i am good for my word, and hopefully by sending a hundred so far, they'll see that
|
That will be fine you can send the other $94.99 once you are ready. We will plan that you will pay the rest. |
|
|
|
|
06-15-2010, 10:07 PM
|
#76
|
|
Premier V.I.P. Member
Join Date: Feb 2009
Location: Oxbow SK
Posts: 1,385
|
thanks aaron, and i'll be sure to make sure you get the 194.99 in usd, if you dont want cad, feel free to cancel payment. if cad is ok, i'll send you another 106.04 to cover the rest (thats right now, by then the dollar will be different)
__________________
2002 Alero w/ 2.2 ecotec 5 speed
power window conversion, heated leather seats, 16" rims, high & low hids, auto dimming rear mirror, speedbuilt front and rear sway bars, poly bushings all around.
2005 Silverado 2500HD w/ 6.0l Vortec 4L80E
Tuned 6.0l, exhaust, intake, with 450000km on the odometer. Tow Rig
1985 Pontiac Trans Am GTA w/ 5.7 Vortec 700r4
mild vortec 350 with 4 speed auto. performance suspension. factory gold color. project car
|
|
|
|
|
06-16-2010, 07:02 AM
|
#77
|
|
GX Member
Join Date: Jun 2010
Location: MN
Posts: 35
|
Yeah it will have to be $194.99 USA when it is all said and done |
|
|
|
|
06-16-2010, 01:07 PM
|
#78
|
|
GX Member
Join Date: Jun 2010
Location: MN
Posts: 35
|
2 left to get the clock started |
|
|
|
|
06-16-2010, 02:17 PM
|
#79
|
|
GL Member
Join Date: Apr 2006
Location: Torrington, CT
Posts: 734
|
question, didnt whitemexican already pay??If so isnt only 1 more to pay, apart from colonel paying in full.
__________________
* 02 Gx 5-Speed - Supercharged *
|
|
|
|
|
06-16-2010, 04:07 PM
|
#80
|
|
GX Member
Join Date: Jun 2010
Location: MN
Posts: 35
|
That was a proto type, and is not on the actual production run. We would hope we could get 5 in the actual production run as that still is not very many...
|
|
|
|
|
Currently Active Users Viewing This Thread: 1 (0 members and 1 guests)
|
|
|
| Thread Tools |
Search this Thread |
|
|
|
| Display Modes |
 Linear Mode Linear Mode
|
 Posting Rules
|
You may not post new threads
You may not post replies
You may not post attachments
You may not edit your posts
HTML code is Off
|
|
|
All times are GMT -4. The time now is 05:21 PM.
|