Alrighty then, so I’ve been reading a lot of posts about how you could put on an air intake for a 2.4L Twin Cam. The way I did it seems to be the easiest and can be done in about an hour once you have all the materials and a well laid out plan.
Step 1. Getting an Intake
First you have to get your intake tubing and filter, this isn’t hard just hit it ebay and type in Cavalier Z24 intake and fine one that is made to run all the way to the throttle body, not the ones that bolt up to the ribbed air box or resignator (whatever u get the idea) It does not matter what one you buy they are all the same thing. Now there is a common misuse of the term cold air intake, the type I am explaining is a warm air intake, or the filter sits within the engine bay, a true cold air intake has the filter down in the fender. But anyways
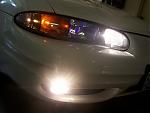
It should look like this
Good

Bad

Step 2. Removing you old air system
Now once you have you shiny new intake look it over make sure its ok then, pop that hood and lets start taking out the factory crap.
A. The first place I started was taking out the air filter box, simply undo the top and pull the filter out for an easier access to all the bolts. Unscrew all the bolts that hold it down then loosen the rubber tube that connects to it. It should now just come on out.
B. Now that you have that taken out carefully unplug the air intake temp. sensor that is located on the bend of the rubber tube. Once it is out put it somewhere out of the way, but in a spot you will not forget it. Then disconnect and remove your battery.
C. Now you can take the rubber tube off if you wish or just leave it on as it will come off with the next piece. The next piece come of but using a screw driver or a nut driver through the small hole in the front of it, it goes to a clamp that goes around the throttle body, losen this and pull of the vacuum line and it should come right off. There may be a few cables running over this piece, I know there was one mine because the previous owner installed an aftermarket cruise control system in it.
D. Once everything is off your basically done removing the stock intake system except for a rubber ring that goes around the throttle body, just pull it off you wont need it.
Step 3. Prepping the intake of installation.
A. Probably the most important thing to do before you bolt in your new intake is to set it up for the air intake temp. sensor. One the one I bought the port was on the last bend of the intake near the fuse box, but on our cars its down near the battery. This is a simple fix, basically find a way to plug the old hole, I used a rubber plug then find a bung (rubber piece) that your sensor fits in snugly and drill a hole in the correct spot on the intake for it, insert the rubber bung the the sensor out of the old rubber tube in and your ready to start installation.
Step 4
A. Now that you intake is all ready start by sitting it in its place. Mine had a bracket welded to it the stuck straight out from the tube, I used this to my advantage by bending it and moving it to go behind a bolt that was located by the power steering pump, bend this around until it will hold the intake snugly. Once you have it bend the right way don’t bolt it in quite yet.
Pic pointing bolt out.
B. Now on mine I had to lengthen the vacuum hose coming from the engine, this was as simple as finding another piece of rubber tubing and finding a hose connector that would hold them together, put the new piece of hose on the old hose before you set in your new intake
C. Now that its all set loosen the bolt near the power steering pump just enough to fit the bracket behind it, put you clamps around the rubber (or silicone) elbow that connects the intake tube to the throttle body and stretch the elbow over the throttle body, now tighten down both clamps as snug as you can go.
D. Now wiggle the intake around until you get the bracket you bend so perfectly behind that bolt. If it wasn’t so perfect like my 10 attempts just get a pair of pliers and bend it until it fits into place, but be careful not to break the aluminum bracket. Tighten it down and move on to the next step
E. Now that that its bolted firmly in place try putting on your filter, if it was hitting the fuse box like mine was, try bending the bracket to get it to move, or take the inpatient and probably stupid route I did and pull on the intake until the bracket bends enough to fit the filter in. Tighten down the clamp on the filter now.
F. Now the last two things are to attach your vacuum line using a hose clamp as well and DO NOT forget to plug in your air intake temp sensor. Now that’s its all plugged in you should be done
If I missed anything or there is any helpful inputs add it to this thread and I will incorporate it into this post.


 Threaded Mode