03-30-2007, 12:42 AM
|
#21
|
|
GLS member
Join Date: Jul 2006
Location: wisconsin
Posts: 2,733
|
Quote:
Originally Posted by cavaliers60

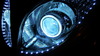
If I can get a good picture to turn out, I'll snap a pic of my interior lights... I replaced all the lights with white LEDs (the two in the mirror, the one in the dome light, and the two under the dash).... The other two in that dome light, I put blue LEDs in, but rarely use them cause of the police... Other than that, it looks pretty cool. I'm thinking of doing the same thing with my new car whenever I get it... I like the Whiteness of the LEDs.
|
You can't really see the dome light from outside of the car, you don't have a thing to worry about with the police.
I drove around with cathodes sewn into my headliner right above the windows and didn't even have problems once.
And even in the Buick with blue LEDs in the front domelights I've been ok.
but I usppose better safe than sorry could play out, too.
__________________
|

|

|
|
03-30-2007, 02:16 PM
|
#22
|
|
Soon to be banned again
Join Date: Nov 2005
Location: Bellmore, NY
Posts: 3,372
|
Quote:
Originally Posted by cherrington17
the tube lights should be 3157? from superbrightleds.com
|
can anyone vouch for this? thinking about doing it today
__________________

I shaved my balls for this?
|
|
|
|
|
03-30-2007, 02:49 PM
|
#23
|
|
The Drunk
Join Date: Mar 2006
Location: Goleta, California
Posts: 770
|
A little poking on their site says 4410's. They link to the sylvania site and at least on the 2003 ho they say the dome replacement is a 212-2 which their chart says is 4410. If it's anything like mine it won't look anything like the bulb you'll pull out. Mine had looped wires on each end instead of metal cones. But when I put in the 212-2 it fit just fine. I think I ened up bending the prongs a little just to make it grab a little tighter so I felt better...
|
|
|
|
|
04-02-2007, 02:04 AM
|
#24
|
|
GLS member
Join Date: Aug 2006
Location: In the bat cave.
Posts: 2,720
|
Dear Cherry:
Please make a detailed how to on the whole gauge thing i just bought 10 red led's and 10 resistors and i know how to get the thing apart. just not very good at the whole soldering shit and knowing a damn thing about leds 
__________________
Quote:
Originally Posted by 99alerogirl
come on old man you know it's more polite to swallow...
|
Lonnie: How would she feel if I took the booty one of the ladies has offered up.. What am I going to say... It's not my fault some gifts are better then others.
|
|
|
|
|
04-02-2007, 12:08 PM
|
#25
|
|
Captain Funpark
Join Date: Jan 2006
Location: Vincennes, IN
Posts: 7,034
|
Quote:
Originally Posted by adam337
Dear Cherry:
Please make a detailed how to on the whole gauge thing i just bought 10 red led's and 10 resistors and i know how to get the thing apart. just not very good at the whole soldering shit and knowing a damn thing about leds |
Like I said before..... If you just want one color behind the gauge, it's much easier just getting the 194 LED bulbs and sticking them in there... No soldering, no wireing, nothing! Just plug in and light up! lol |
|
|
|
|
04-02-2007, 04:34 PM
|
#26
|
|
GLS member
Join Date: Aug 2006
Location: In the bat cave.
Posts: 2,720
|
Note the fact that i already bought leds. youre really not helping cav =\
__________________
Quote:
Originally Posted by 99alerogirl
come on old man you know it's more polite to swallow...
|
Lonnie: How would she feel if I took the booty one of the ladies has offered up.. What am I going to say... It's not my fault some gifts are better then others.
|
|
|
|
|
04-02-2007, 05:09 PM
|
#27
|
|
Captain Funpark
Join Date: Jan 2006
Location: Vincennes, IN
Posts: 7,034
|
Well then have fun....
|
|
|
|
|
04-02-2007, 06:11 PM
|
#28
|
|
GLS member
Join Date: Aug 2006
Location: In the bat cave.
Posts: 2,720
|
ill try..
__________________
Quote:
Originally Posted by 99alerogirl
come on old man you know it's more polite to swallow...
|
Lonnie: How would she feel if I took the booty one of the ladies has offered up.. What am I going to say... It's not my fault some gifts are better then others.
|
|
|
|
|
04-03-2007, 08:17 PM
|
#29
|
|
GLS member
Join Date: Aug 2006
Location: In the bat cave.
Posts: 2,720
|
-bump- for cherry..
__________________
Quote:
Originally Posted by 99alerogirl
come on old man you know it's more polite to swallow...
|
Lonnie: How would she feel if I took the booty one of the ladies has offered up.. What am I going to say... It's not my fault some gifts are better then others.
|
|
|
|
|
04-03-2007, 09:09 PM
|
#30
|
|
Gone
Join Date: Mar 2004
Location: Lockport Ny
Posts: 19,244
|
How to Led Gauges, in 7 easy steps! I make wiring FUN!
This up coming week, i'll have some free time, so i might be able to take my gauges out and take pics. But don't bank on it... I've been really busy lately.
check the how to, for wiring leds for basic knowledge of what i'm gonna say. (wiring and distribution block)
I have a small 12 screw distro (6 on each side) Of course, this will cause you to have to over lap some wires, but that won't be a problem.
1: Remove the plastic holders, and remove the 194 bulbs. The easiest way is to look at the bottom where the metal contacts are. Take a small screwdriver or knife and pull out the leads. Then the bulb should just pull straight out.
2: Insert the led... facing forward. Make SURE to sand the tip down flat. It'll look like crap if you don't. I used one per color, in each. Some people used more, its just brighter that way.
3: You can either solder the resistor to either lead, and carefully wrap the leads where the old 194 bulb leads were, thus avoiding to run any more wires. (suggested method) you'll just have to figure out which way to clip it back in, for the correct power/ground combination
4: [if you ignore the previous step] You can just run the leads out each side, totally ignoring the contacts on the circuit board. After each led is in place, but a small bead of hot glue around it, to insure it stays put. (don't want them flopping around in there) Solder a red wire to the power, black to the ground. Personally, i put resistors on the ground side. This is entirely up to you, it doesn't make a difference.
5: Run the soldered wires to the distro block. (i separated mine into red and blue, but yours would be all the same) I ran all the grounds together, and soldered them to one main line that i ran to a solid ground.
6: Splice your center console cubby hole power wire (gray?) and run a line from that to the distro block. be sure to include the jumper so the power is spread to all the spots on the block. This will make it so your lights will turn on at night, only.
7: Make sure your parking break isn't pulled (my "night" lights don't turn on if it is) and find a dark spot.. then sit back and embrace the glow. If its too bright, you can put a resistor in line w/ the power, to restrict some power... I don't think i had to do this for my reds, but i did for the blues.
I ran all the wires off to the right of the cluster. Using some duct tape on the black plastic behind the gauges to hold the wires in place, since there isn't much room once you reinsert the gauges. There should be a gap between where your radio is, and where the gauges are. I put the distro in there. It doesn't touch anything.
Also keep in mind.... It took me like 3 months of troubleshooting to finally get it to stay, unflickering and short proof. There were many nights i was driving home with no gauge lights. Be careful and do things right the first time, and you won't have to do this. I tend to start projects, take forever, then speed up and get sloppy at the end. DON'T DO THAT!
Good luck.
|
|
|
|
|
04-12-2007, 08:50 PM
|
#31
|
|
GX Member
Join Date: Dec 2006
Location: Sioux Falls, SD
Posts: 228
|
Quote:
Originally Posted by 02AleroEco
Thanks turned out great... i found a 2 pack of the 194B at AdvanceAuto for like 1.50/PAIR.. i just need to get 1 more bulb.. looks sweet so far
|
Shit... not bad I just got some for like 1.98 a pair... probably change those out tonight
__________________
Live for something or Die for nothing
|
|
|
|
|
04-13-2007, 01:01 AM
|
#32
|
|
GX Member
Join Date: Dec 2006
Location: Sioux Falls, SD
Posts: 228
|
Well I got mine changed out with some bulbs... although their not as bright as I had hoped for and not exactly the right color because of the green on the stock gauges... I'll probably change them out with leds later on... possibly later this month and I'll def get a new gauge kit to change the greenish tint... xD now I have 3 light colors in my car! Blue, Green, and AQUA!!! 
__________________
Live for something or Die for nothing
|
|
|
|
|
Currently Active Users Viewing This Thread: 1 (0 members and 1 guests)
|
|
|
| Thread Tools |
Search this Thread |
|
|
|
| Display Modes |
 Linear Mode Linear Mode
|
 Posting Rules
|
You may not post new threads
You may not post replies
You may not post attachments
You may not edit your posts
HTML code is Off
|
|
|
All times are GMT -4. The time now is 05:00 PM.
|