Aleromod.com Aleromod.com

Go Back   Aleromod.com > Performance Related > General Performance

Reply
 
Thread Tools Search this Thread Display Modes
Old 09-26-2009, 12:15 PM   #1
Atmosphere
GL Member
 
Atmosphere's Avatar
 
Join Date: Apr 2009
Location: Minnesota
Posts: 235
Atmosphere is on a distinguished road
Upper Strut Mount/Bearing

Ever since I got my car I've had an issue with the right-rear strut. It makes a terrible rattling sound regardless of speed and road condition, and the only time it stops is if pressure is taken off of it (such as going around a tight left turn).

Irritated, I took a look. The only difference between the left and right strut is that the top of the right strut can move a good half inch while the left one stays put. Did a little more research, and it turns out that there's a little bearing that sits on top of the upper strut mount and is designed to keep the top of the strut in place.

Sounds like an easy fix?

I called my local mechanic for a quote, and he wants some $200+ to replace the bearing and to do an alignment on the car.

Is this accurate? I really hate the sound, but $200 seems pretty steep to replace a little bearing. Not only that, but I'm not sure how removing the strut, replacing the bearing, and putting the strut back in will affect the alignment.
__________________
2K 3.4L 4DR GLS
Atmosphere is offline   Reply With Quote
Old 09-26-2009, 12:23 PM   #2
cherrington17
Gone
 
cherrington17's Avatar
 
Join Date: Mar 2004
Location: Lockport Ny
Posts: 19,244
cherrington17 has a spectacular aura aboutcherrington17 has a spectacular aura about
Send a message via AIM to cherrington17
if you remove the strut/mount... you will need an alignment after.
__________________
Frequently Asked Questions
...You only stop learning when your dead...
cherrington17 is offline   Reply With Quote
Old 09-26-2009, 12:28 PM   #3
Atmosphere
GL Member
 
Atmosphere's Avatar
 
Join Date: Apr 2009
Location: Minnesota
Posts: 235
Atmosphere is on a distinguished road
Alright, thanks. I just wasn't sure since I would've assumed that the strut went back exactly the same way it came out. That only justifies a small portion of the final price, however.
__________________
2K 3.4L 4DR GLS
Atmosphere is offline   Reply With Quote
Old 09-26-2009, 01:37 PM   #4
cherrington17
Gone
 
cherrington17's Avatar
 
Join Date: Mar 2004
Location: Lockport Ny
Posts: 19,244
cherrington17 has a spectacular aura aboutcherrington17 has a spectacular aura about
Send a message via AIM to cherrington17
it does... and if a good mech does it, you CAN have it done w/o needing an alignment... but also.. any good mech will do one anyway.
__________________
Frequently Asked Questions
...You only stop learning when your dead...
cherrington17 is offline   Reply With Quote
Old 09-26-2009, 03:37 PM   #5
A57
GL Member
 
A57's Avatar
 
Join Date: Jan 2007
Location: Michigan
Posts: 252
A57 is on a distinguished road
Send a message via Yahoo to A57
In general any shop you goto they will do and aligment for any suspension work .... then you have time for remoing and restalling the parts.. it looks like 50 for removing and parts 80 and 49.99 to 69.99 for the aligment.
A57 is offline   Reply With Quote
Old 09-26-2009, 04:37 PM   #6
Ryan from Ohio
Master of my Domain
 
Ryan from Ohio's Avatar
 
Join Date: Nov 2006
Location: Toledo, Ohio
Posts: 4,072
Ryan from Ohio will become famous soon enough
I got a strut mount out up front, drivers side.

SOB POS ALERO!

ARGGGHHHH

Just thought I would vent here.

Now to just replace the mount, or toss struts and an alignment in...
__________________
-Ryan
Ryan from Ohio is offline   Reply With Quote
Old 09-26-2009, 10:06 PM   #7
undersc0re
GX Member
 
Join Date: Jul 2005
Posts: 113
undersc0re is on a distinguished road
You can get a munroe quick strut, its an all in one around 140 bux Canadian, comes with new spring strut bushing and mount/bearing. Easy DIY, save some money, do them both then go for alignment! No messing around with a spring compressor.
undersc0re is offline   Reply With Quote
Old 09-26-2009, 10:11 PM   #8
Atmosphere
GL Member
 
Atmosphere's Avatar
 
Join Date: Apr 2009
Location: Minnesota
Posts: 235
Atmosphere is on a distinguished road
That's definitely a possibility. I've been considering getting some KYB GR2s or AGXs for a while though, then doing a Sprint drop or similar.

It's Minnesota though, so I'm not sure how smart it would be to drop. My car is pretty much a daily driver, too. Preferably I'd bag it, but I don't exactly have two grand to kick around.
__________________
2K 3.4L 4DR GLS
Atmosphere is offline   Reply With Quote
Old 09-26-2009, 11:28 PM   #9
bkathsalero
GL Member
 
bkathsalero's Avatar
 
Join Date: Apr 2007
Location: Faribault, Minnesnowta
Posts: 633
bkathsalero is on a distinguished road
Send a message via MSN to bkathsalero
depending where your at in MN. I can do an alignment on your car for idk 20 bucks or lunch The shop is in Eagan and it would HAVE to be on a sat

Can negotiate strut also
__________________
bkathsalero is offline   Reply With Quote
Old 09-27-2009, 12:06 AM   #10
PappaSmurf
GLS member
 
PappaSmurf's Avatar
 
Join Date: Apr 2009
Location: Nauvoo, AL
Posts: 827
PappaSmurf is on a distinguished road
Bkathsalero,
How much you charge to rip apart engines and figure out wtf is wrong with them, and then fix? LOL
-Smurf-

P.S. Lunch AND Dinner??????? LMAO
__________________
"Check mate Bitch!"
PappaSmurf is offline   Reply With Quote
Old 09-27-2009, 12:58 AM   #11
bkathsalero
GL Member
 
bkathsalero's Avatar
 
Join Date: Apr 2007
Location: Faribault, Minnesnowta
Posts: 633
bkathsalero is on a distinguished road
Send a message via MSN to bkathsalero
at least a 16oz steak and depending what is wrong a baked potato as well
__________________
bkathsalero is offline   Reply With Quote
Old 09-27-2009, 01:02 AM   #12
PappaSmurf
GLS member
 
PappaSmurf's Avatar
 
Join Date: Apr 2009
Location: Nauvoo, AL
Posts: 827
PappaSmurf is on a distinguished road
Hell if you could give me the step by step directions on replacing, I even throw in the bacon bits, chives, butter and sour cream. ROTFLMAO
-Smurf-
__________________
"Check mate Bitch!"
PappaSmurf is offline   Reply With Quote
Old 09-27-2009, 10:44 AM   #13
bkathsalero
GL Member
 
bkathsalero's Avatar
 
Join Date: Apr 2007
Location: Faribault, Minnesnowta
Posts: 633
bkathsalero is on a distinguished road
Send a message via MSN to bkathsalero
Engine Replacement
Removal Procedure for 3.4

1. Disconnect the negative battery cable.
2. Relieve fuel pressure.
3. Drain the engine coolant.
4. Remove the engine air cleaner assembly.
5. Remove the hood.
6. Remove the drive belt.
7. Remove the hoses from the surge tank
8. Remove the cruise control module.
9. Remove the engine wiring harness from the top of the engine. Set the harness aside.
10. Disconnect the throttle cable.
11. Disconnect the cruise control cable.
12. Raise and suitably support the vehicle
13. Remove the starter.
14. Remove the Air Conditioning (A/C) compressor with the lines attached. Position the A/C compressor aside.
15. Disconnect and position aside the lower engine wiring harness.
16. Disconnect the catalytic converter flange from the rear exhaust manifold.
17. Remove the bolts that secure the torque converter to the flywheel.
18. Remove the right front fender liner.
19. Remove the brace that joins the transaxle to the engine.
20. Remove front transmission mount and bracket.
21. Remove the 2 outer transmission mounting bolts.
22. Lower the vehicle.
23. Disconnect the upper and the lower radiator hoses.
24. Disconnect the fuel lines at the quick-connects.
25. Disconnect the engine vacuum hoses from the brake booster.
26. Disconnect the heater hoses.
27. Remove the power steering pump.
28. Install the engine lifting device.
29. Remove the engine mount and the adapter.
30. Remove the bolts that retain the transaxle to the engine.
31. Remove the engine from the vehicle.
32. Remove the engine flywheel.
33. Mount the engine onto a suitable engine stand.

Installation Procedure

1. Attach the engine lifting device. Remove the engine from the engine stand.
2. Install the engine flywheel.
3. Position the engine in the vehicle and align the engine with the transaxle.
4. Install the upper transaxle mounting bolts.

o Tighten the bolts to 90 Nm (66 ft. lbs.) .

5. Install the engine mount assembly.
6. Remove the engine lifting device.
7. Install the power steering pump to the engine front cover.
8. Connect the upper and the lower radiator hoses.
9. Raise and suitably support the vehicle. Refer to Vehicle Lifting.
10. Install the 2 mounting bolts that secure the outer transaxle to the engine.

o Tighten the bolts to 90 Nm (66 ft. lbs.) .

11. Install the transaxle to engine brace.
12. Install the right front fender liner.
13. Install the bolts that secure the flywheel to the torque converter.
14. Install the A/C compressor.
15. Install the starter.
16. Install the flywheel inspection shield.
17. Install the catalytic converter to the rear exhaust manifold.
18. Install a new oil filter.
19. Install the lower engine wiring harness and the retainers.
20. Lower the vehicle.
21. Connect the fuel lines at the quick-connects.
22. Install the heater hoses.
23. Install the engine wiring harness and the retainers at the top of the engine.
24. Connect the vacuum hoses.
25. Connect the cruise control cable.
26. Replace the throttle control cable.
27. Install and connect the cruise control module.
28. Install the drive belt.
29. Connect the surge tank hoses.
30. Install the hood.
31. Install the air cleaner assembly.
32. Fill the engine coolant.
33. Fill the crankcase to the correct level. .
34. Start the engine and inspect for leaks.
35. Stop the engine.
36. Inspect the fluid levels.
__________________

Last edited by bkathsalero : 09-27-2009 at 11:02 AM.
bkathsalero is offline   Reply With Quote
Old 09-27-2009, 11:03 AM   #14
bkathsalero
GL Member
 
bkathsalero's Avatar
 
Join Date: Apr 2007
Location: Faribault, Minnesnowta
Posts: 633
bkathsalero is on a distinguished road
Send a message via MSN to bkathsalero
Engine Replacement 2.4 (Automatic Transmission)

* Tools Required
* J28467-360 Engine Support Fixture
* J24420-C Harmonic Balancer Puller
* J34730-250 Fuel Pressure Gauge and Adapter
* J36018 Belt Tensioner Gauge
* J38122-A Crankshaft Balancer Holder

Removal Procedure

1. Drain the engine coolant.
2. Drain the engine oil.
3. Remove the fuel rail assembly.
4. Disconnect the ignition coil and the module assembly.
5. Disconnect the camshaft position sensor.
6. Remove the power steering pump and set aside with the lines attached.
7. Disconnect the oil pressure sending switch.
8. Remove the cruise control module and set aside.
9. Remove cruise (1) and throttle cables from throttle body.
10. Disconnect the following components:

o Vacuum line from throttle body
o MAP sensor (3)
o IAC sensor (4)
o Disconnect TPS sensor (2).

11. Disconnect generator electrical.
12. Remove brake booster line from engine.
13. Remove surge tank hose from engine.
14. Raise and suitably support the vehicle.
15. Remove the drive belt.
16. Remove the crankshaft balancer.
17. Remove the starter.
18. Disconnect the exhaust pipe from the exhaust manifold.
19. Remove the torque converter bolts.
20. Remove the A/C compressor bolts. Position the compressor out of the way.
21. Remove the lower oil pan to bell housing bolts.
22. Remove lower radiator hose from engine.
23. Lower the vehicle.
24. Remove the transmission mount.
25. Remove upper radiator hose from engine.
26. Remove the upper transmission to engine bolts.
27. Install the engine lifting device. Support the transaxle.
28. Remove engine mount.
29. Raise the engine slightly to separate the engine from the transaxle and remove from vehicle.
30. Remove the flywheel bolts and the flywheel.
31. Mount the engine on a suitable engine stand.

Installation Procedure

1. Remove engine from stand.
2. Use the J38122-A to hold the balancer while tightening the flywheel bolts
3. Install the flywheel, the retainer and the bolts. Tighten bolts to 30 Nm (22 ft. lbs.). Then turn all bolts an additional 45 degrees.
4. Attach the engine lifting device to the engine.
5. Install the engine into the vehicle and align the transaxle to the engine.
6. Install the upper transmission to engine bolts. Tighten bolts to 75 Nm (55 ft. lbs.).
7. Install the engine mount and the mount bracket.
8. Remove engine hoist.
9. Install upper radiator hose to engine.
10. Install the transaxle mount.
11. Raise and support the vehicle.
12. Install the lower radiator hose to engine.
13. Install lower engine to transmission bolts. Tighten bolts to 75 Nm (55 ft. lbs.).
14. Install A/C compressor.
15. Install the torque converter bolts.
16. Connect the exhaust pipe.
17. Install the starter.
18. Install the transaxle brace.
19. Install the crankshaft balancer.
20. Install the drive belt.
21. Install the engine splash shield.
22. Install the front wheels.
23. Lower the vehicle.
24. Install surge tank hose.
25. Install brake booster vacuum line.
26. Connect generator electrical.
27. Connect the following electrical connectors:

o The MAP sensor (3)
o The IAT sensor (4)
o The evaporator canister (1)
o The EGR sensor
28. Install the accelerator cable (1) and bracket.
29. Install the cruise control assembly.
30. Connect the oil pressure switch.
31. Install the power steering pump.
32. Connect the camshaft position sensor.
33. Connect the ignition coil and module.
34. Install the fuel rail assembly.
35. Install the air intake assembly.
36. Refill the engine oil.
37. Refill the engine cooling system.
38. Run the engine to operating temperature and retest all fluid levels.
__________________
bkathsalero is offline   Reply With Quote
Old 09-27-2009, 11:04 AM   #15
bkathsalero
GL Member
 
bkathsalero's Avatar
 
Join Date: Apr 2007
Location: Faribault, Minnesnowta
Posts: 633
bkathsalero is on a distinguished road
Send a message via MSN to bkathsalero
__________________________________________________ _______
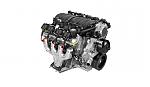
Engine Replacement 2.4 (Manual Transmission)
Removal Procedure

1. Disconnect the negative battery cable.
2. Drain the cooling system.
3. Evacuate the A/C System.
4. Remove the air cleaner duct.
5. Remove the air cleaner.
6. Remove the underhood fuse block.
7. Remove the air cleaner bracket.
8. Disconnect the shift cables at the shift control.
9. Remove the shift cables from the bracket and remove the bracket.
10. Disconnect the back up lamp switch.
11. Disconnect the vehicle speed sensor.
12. Disconnect the upper engine electrical harness.
13. Disconnect the vacuum lines.
14. Relieve the fuel pressure.
15. Disconnect the fuel line quick disconnects.
16. Remove the upper radiator hose.
17. Disconnect the heater hoses from the heater core.
18. Disconnect the slave cylinder hydraulic line.
19. Remove the EVAP solenoid.
20. Disconnect the ground cables at the rear of the engine block.
21. Remove the power steering pump with lines attached and position the pump out of the way.
22. Disconnect the electrical connector from the A/C compressor and the CKP. Position the harness aside.
23. Remove the starter with the wires attached and position it out of the way.
24. Disconnect the surge tank bypass hose from the engine.
25. Disconnect the cruise and accelerator cables from the throttle body.
26. Remove and position aside the cruise control module.
27. Tie the radiator to the hood latch panel with mechanics wire.
28. Raise and support the vehicle.
29. Safety strap the front of the vehicle to the hoist.
30. Drain the transaxle.
31. Drain the engine oil and remove the oil filter.
32. Remove the engine splash shields.
33. Remove the front closeout panel fasteners and the panel.
34. Remove the lower radiator support.
35. Remove the right front brake hose from the vehicle.
36. Remove the retaining nut from the BPMV at the mounting bracket.
37. Disconnect the wheel speed sensors.
38. Remove the wheel speed sensor harnesses from the control arm retainers.
39. Remove the wheel speed sensor harnesses from the frame retainers and position them out of the way.
40. Remove the wheel driveshafts.
41. Disconnect the ball joints from the control arms.
42. Disconnect the outer tie rod ends from the control arms.
43. Disconnect the catalytic converter from the exhaust manifold.
44. Remove the A/C compressor hose from the A/C compressor.
45. Remove the bolt from the power steering pressure line retainer.
46. Lower the vehicle until the front suspension crossmember rests on the support table.
47. Position a three inch block of wood between the front of the oil pan and the crossmember.
48. Remove the front engine mount to bracket bolts.
49. Remove the front suspension crossmember retaining bolts.
50. With the help of an assistant, carefully raise the vehicle off of the engine/transaxle assembly.
51. Install the engine hoist to the engine/transmission assembly.
52. Remove the front transmission mount thru bolt.
53. Remove the rear transmission mount thru bolt.
54. Remove the two side transmission mount lower nuts.
55. Lift the engine/transaxle assembly off of the front suspension crossmember.
56. Separate the transaxle from the engine.
57. Remove the clutch drive plate and clutch driven plate.
58. Remove the flywheel.
59. Mount the engine on a suitable engine stand.

Installation Procedure


1. Remove the engine from the engine stand.
2. Install the flywheel to the engine.
3. Install the clutch driven plate and clutch drive plate.
4. Install the transaxle to the engine.
5. Lower the engine/transaxle assembly on to the front suspension crossmember.
6. Install the two side transmission mount lower nuts. Tighten the transmission mount lower nuts to 44 Nm (60 ft. lbs.).
7. Install the rear transmission mount thru bolt. Tighten the rear transmission mount thru bolt to 55 Nm (75 ft. lbs.).
8. Install the front transmission mount thru bolt. Tighten the front transmission thru bolt to 55 Nm (75 ft. lbs.).
9. Remove the engine hoist from the engine/transaxle assembly.
10. With the help of an assistant, carefully lower the vehicle on to the engine/transaxle assembly.
11. Install the front suspension crossmember retaining bolts.
12. Install the front engine mount to bracket bolts.
13. Raise the vehicle off of the support table.
14. Install the bolt to the power steering pressure line retainer.
15. Install the A/C compressor hose to the A/C compressor.
16. Connect the catalytic converter to the exhaust manifold.
17. Connect the outer tie rod ends to the control arms.
18. Connect the ball joints to the control arms.
19. Install the wheel driveshafts.
20. Install the wheel speed sensor harnesses to the frame retainers. Ensure the retainers lock into position.
21. Install the wheel speed sensor harnesses to the control arm retainers. Ensure that the retainers lock into position.

22. Connect the wheel speed sensors.
23. Install the retaining nut to the BPMV at the mounting bracket.
24. Install the right front brake hose to the vehicle.
25. Install the lower radiator support.
26. Install the front closeout panel and the panel fasteners. Ensure the fasteners are retained.
27. Install the engine splash shields.
28. Install a new oil filter and fill the engine with oil.
29. Fill the transaxle with specified lubricant.
30. Remove the safety straps from the front of the vehicle and the hoist.
31. Lower the vehicle.
32. Untie the radiator from the hood latch panel.
33. Install the cruise control module.
34. Connect the cruise and accelerator cables to the throttle body.
35. Connect the surge tank bypass hose to the engine.
36. Install the starter.
37. Connect the electrical connectors to the A/C compressor and the CKP.
38. Install the power steering pump.
39. Connect the ground cables at the rear of the engine block.
40. Install the EVAP solenoid.
41. Connect the slave cylinder hydraulic line.
42. Connect the heater hoses to the heater core.
43. Connect the radiator hoses.
44. Connect the fuel line quick disconnects.
45. Connect the vacuum lines.
46. Connect the upper engine electrical harness.
47. Connect the VSS.
48. Connect the back up lamp switch.
49. Install the shift cable bracket and the shift cables to the bracket.
50. Connect the shift cables at the shift control.
51. Install the air cleaner bracket.
52. Install the underhood fuse block.
53. Install the air cleaner.
54. Install the air cleaner duct.
55. Charge the A/C system.
56. Fill the cooling system.
57. Connect the negative battery cable.

__________________________________________________ _______
I'm looking forward to the meal!!!
Pictures available after dessert

and sorry for crapping your thread atmosphere
__________________
bkathsalero is offline   Reply With Quote
Old 09-27-2009, 11:17 AM   #16
Atmosphere
GL Member
 
Atmosphere's Avatar
 
Join Date: Apr 2009
Location: Minnesota
Posts: 235
Atmosphere is on a distinguished road
Something tells me this should be on the upgrades site.
__________________
2K 3.4L 4DR GLS
Atmosphere is offline   Reply With Quote
Old 09-27-2009, 11:19 AM   #17
bkathsalero
GL Member
 
bkathsalero's Avatar
 
Join Date: Apr 2007
Location: Faribault, Minnesnowta
Posts: 633
bkathsalero is on a distinguished road
Send a message via MSN to bkathsalero
so where are you at in mn atmosphere?
__________________
bkathsalero is offline   Reply With Quote
Old 09-27-2009, 12:57 PM   #18
clutch1
GLS member
 
clutch1's Avatar
 
Join Date: Jul 2006
Location: wisconsin
Posts: 2,733
clutch1 is on a distinguished road
Send a message via AIM to clutch1
Quote:
Originally Posted by Atmosphere View Post
Ever since I got my car I've had an issue with the right-rear strut. It makes a terrible rattling sound regardless of speed and road condition, and the only time it stops is if pressure is taken off of it (such as going around a tight left turn).

Irritated, I took a look. The only difference between the left and right strut is that the top of the right strut can move a good half inch while the left one stays put. Did a little more research, and it turns out that there's a little bearing that sits on top of the upper strut mount and is designed to keep the top of the strut in place.

Sounds like an easy fix?

I called my local mechanic for a quote, and he wants some $200+ to replace the bearing and to do an alignment on the car.

Is this accurate? I really hate the sound, but $200 seems pretty steep to replace a little bearing. Not only that, but I'm not sure how removing the strut, replacing the bearing, and putting the strut back in will affect the alignment.


Rear struts don't have a bearing. Only front ones do... it's a large bearing that allows them to rotate when you turn the wheels. Obviously since rear struts are fixed they don't need a bearing.

However, you are absolutely correct in assuming the noise is caused by the upper strut mount, the rubber bushings in them goes out and causes it to be loose and knock around. You can eaaaasily replace it yourself.. like this.

A new upper mount is about $30.. or you could get a quick strut. It depends on if you want to deal with the spring (they can be a bitch without a good spring compressor, your call).

Next take the wheel off and set the parking brake. Get an angle finder (like $3 at Harbor freight), and put it on the brake disc vertically. Make a line around it with marker and note the angle it reads (your camber reading).

Now proceed to take out the 2 bolts holding the strut to the knuckle, and the 2 (3 maybe? I don't remember) holding it to the body. move it around till it comes out. Now either replace the upper mount or slide in the new strut. Bolt it up, but leave the bottom loose. Put your angle finder back on where you marked, and tilt the knuckle slightly until you have your angle back. Now tighten up the bottom bolts.

It's that easy.. you don't need to worry about alignment THAT much. As long as you get it close you won't wear your tires out, and the rear camber doesn't effect pull much.
__________________
clutch1 is offline   Reply With Quote
Old 09-27-2009, 03:12 PM   #19
undersc0re
GX Member
 
Join Date: Jul 2005
Posts: 113
undersc0re is on a distinguished road
If you hear clunking back there be sure to check the rear stabilizer bar mounts, not out at the wheels but where the bar gets mounted to the body, the rubber bushing wears out and that bar clunks around, usually on the little bumps, check it out if the clunking is driving you nuts, very common for this to happen! It makes quite a racket back there when the rubber is totally gone!
undersc0re is offline   Reply With Quote
Old 09-28-2009, 07:55 AM   #20
Atmosphere
GL Member
 
Atmosphere's Avatar
 
Join Date: Apr 2009
Location: Minnesota
Posts: 235
Atmosphere is on a distinguished road
Quote:
Originally Posted by bkathsalero
so where are you at in mn atmosphere?

Same place as Rida.

Quote:
Originally Posted by clutch1
Rear struts don't have a bearing. Only front ones do... it's a large bearing that allows them to rotate when you turn the wheels. Obviously since rear struts are fixed they don't need a bearing.

However, you are absolutely correct in assuming the noise is caused by the upper strut mount, the rubber bushings in them goes out and causes it to be loose and knock around. You can eaaaasily replace it yourself.. like this.

Bushings! That's what it was... sorry, I didn't mean bearing. Thanks for the help!
__________________
2K 3.4L 4DR GLS
Atmosphere is offline   Reply With Quote
Reply


Currently Active Users Viewing This Thread: 1 (0 members and 1 guests)
 
Thread Tools Search this Thread
Search this Thread:

Advanced Search
Display Modes

Posting Rules
You may not post new threads
You may not post replies
You may not post attachments
You may not edit your posts

vB code is On
Smilies are On
[IMG] code is On
HTML code is Off
Forum Jump


All times are GMT -4. The time now is 08:10 AM.


Powered by vBulletin Version 3.6.0
Copyright ©2000 - 2024, Jelsoft Enterprises Ltd.