submitted by Sound Xtreme
I am going to explain this to the best of my ability, maybe someone like silent can post another topic showing how he does it if he wants. But here goes. Actually starting out was a lot easier than I thought. It only took me about 5 hours to do both assemblies. However if you are unexperienced in these sort of things BE CAREFUL, headlights are not cheap! Even if you go to a junkyard to get them. Here are the stages I have come up with: 1. Prep 2. Disassembling of headlight 3. Disassembling of inner headlight 4. Taking out the orange corner piece 5. Cleaning out/off the old silicone 6. Polish Here are the tools/items that I used during this. Utility knife, pocket knife, flat head screw driver, small flat head screw driver, silicone(I used clear, though any color should do), and a hair dyer/heat gun. 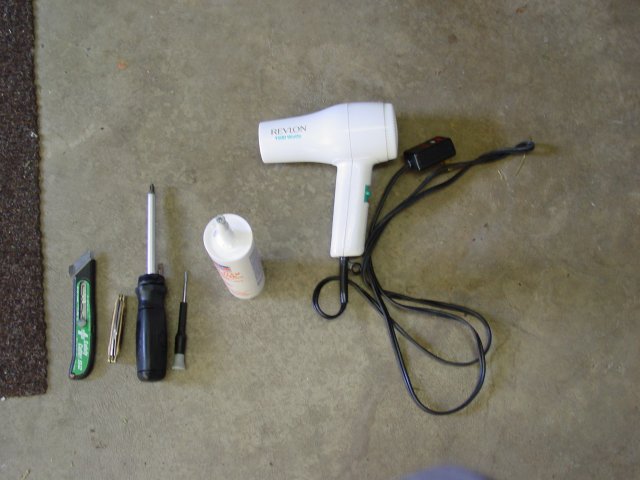 First things first. Heat up the silicone that is keeping the clear and grey parts of your headlight with either a hair dryer or heat gun. The hair dryer pictured above worked great for me. 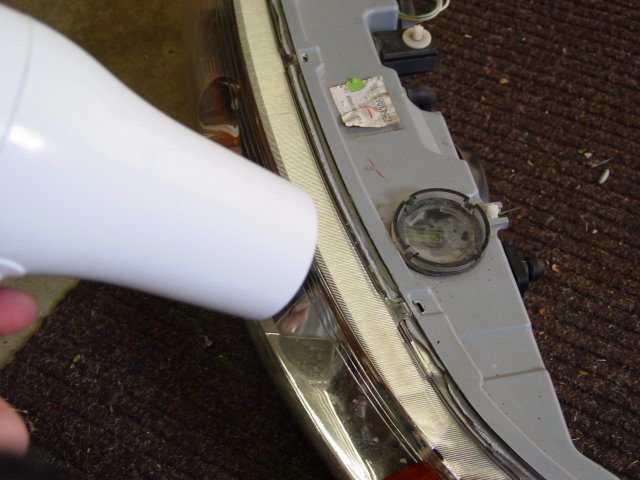 Next use a utility or exacto knife to make a cut in some of the old silicone that you will be removing later. After you go all the way around it and keep applying heat you should be able to start wigglying it. Just keep wigglying it around until you get it apart, mine came farely easily at this part. A flat head screwdriver can also be used to pry the pieces apart. This is exactly one of the easy parts, the next step I thought was harder. 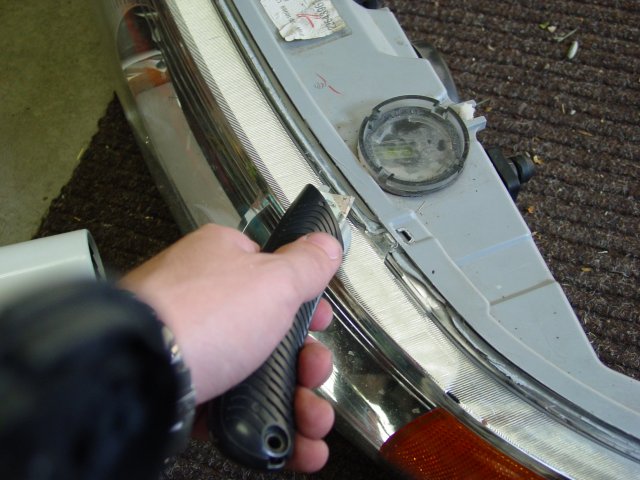 Thirdly you are going to start taking apart the inner assembly(the chrome piece that is glued inside the clear piece. This part IS a quite a bit more challenging and the chrome piece is kind of fagile so be CAREFUL. First heat up the chrome piece that is connected to the clear part(this is pictured below and is marked with a red dot). I also suggest doing the one all the way in the corner last(the piece is curved). 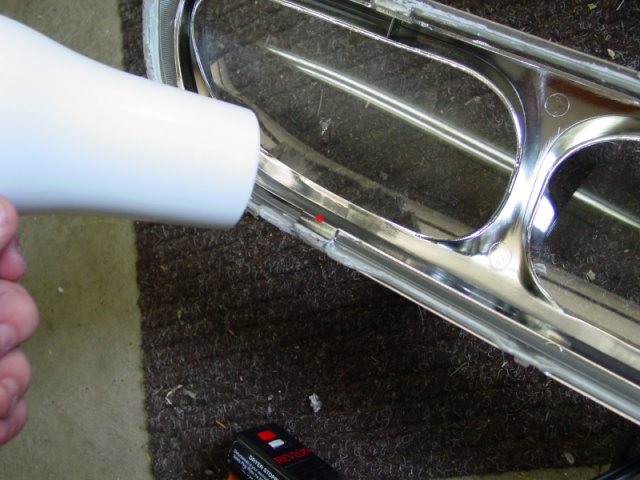 Once the part is well heated and I do mean well(almost too hot to touch) take any knife you feel sure about yourself with(I used a regular pocket knife and went up from underneath, this seemed extremely useful here each one gave away easily) 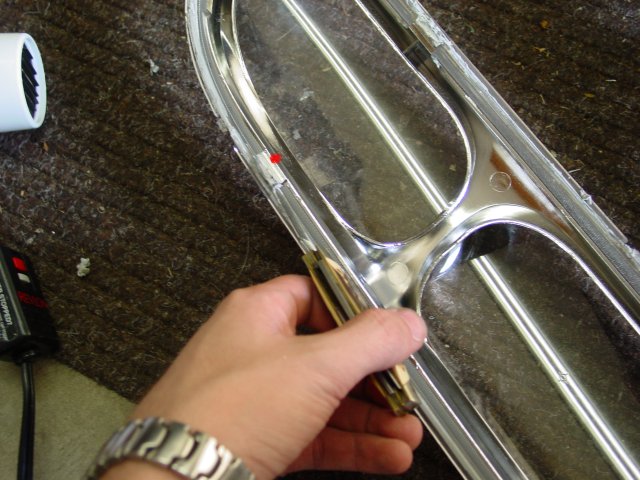 Here is a picture of the last piece to take apart. I just got it really hot and kept wigglying it back and forth, it should eventually start giving away and will just kind of bend right out. HOWEVER, be EXTREMELY CAREFUL here this part is extremely fragile here and very well COULD break off.  Here is a picture of the three pieces you should have after seperating silicone attached pieces. 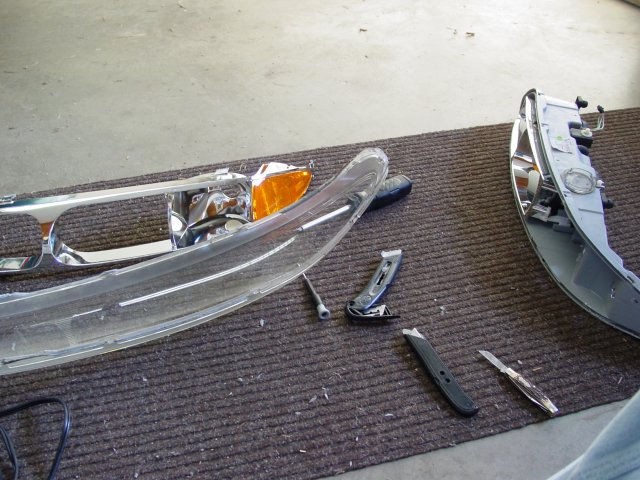 Next you need to take off the orange reflector piece. This is probably the easiest step in here. It just snaps in there so pull up where pictured below and it will come out with a little force. 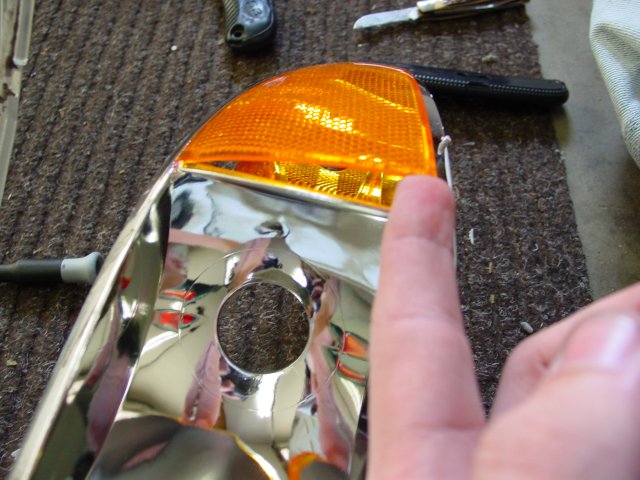 Pic of the chrome piece without the orange reflector. 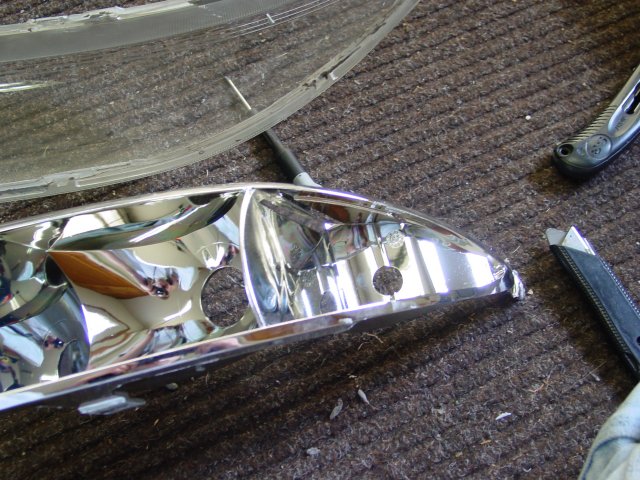 Then you need to start taking out/off some of the old silicone. I took most of it off but it shouldn't hurt anything if you leave some behind as long as you use a silicone that can be used to bond to another silicone. I suggest heating up the old silicone and then taking a small screw driver and run in the grove of the grey piece. For taking off the silicone off of the clear piece(not pictured) I just ran my utilty knife along the outside of it. 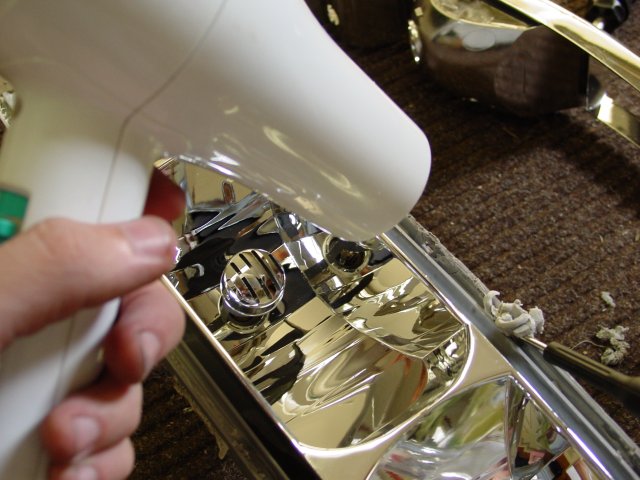 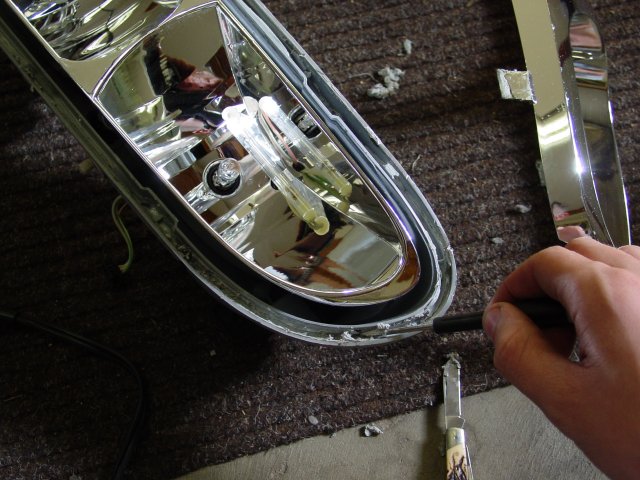 After you have that all cleaned out it is a good idea to clean all of the chrome and clear pieces clean of dust and finger prints. I used a dry terry cloth for this. 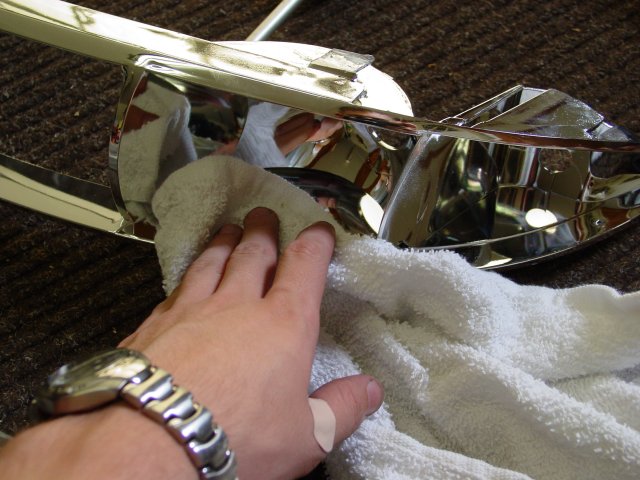 Second to last you need to reassemble the chrome and clear pieces back together. I used silicone for this but I think super glue would have been better(i am not sure about this but I think so). Make sure you let it dry for a little while before going on to the next step.(NO picture) Finally place a good size bead of silicone in the groove of the grey piece (don't worry if you think you put too much, better safe than sorry, it will clean off with a paper towel). After you have your bead placed all around take your other piece(the chrome and clear pieces together) and place it on top of the grey piece. Push down with some force to give a tight snug seal(some silicone may and probably should sqeeze out, just wipe it up with a paper towel). (NO picture) And there you have it CLEAR CORNERS! I hope this helps some of you out there. I hope so considering I had to type all of that with one hand! :D submitted by Silent Alero. Quote:
additional info by Sound Xtreme Quote:
how to remove headlight by Silent Alero Quote:
|
a suggestion on removing the silicon from the lens is to put it in the freezerfor about 5 min then just run your knife under and it will pretty much fall of. I had to place it in the freezer twice since it was hot where I was doing to work.
|
That information sounds great i just need to see the pics. Great description though. You did a nice job. If i am inexperienced in this type of stuff, how long should i expect it to take? Thanx
e-mail - Skippercade22@yahoo.com |
Quote:
|
Pictures are fixed!
|
I really want to do this to my car but i dont know if the law would let people to do that. I was just wondering if anybody had any information on that.........
|
bnight all you have to do if your worried about that is get amber bulbs, aslong as they see amber light up when you go to turn they wont say anything, they also make these bulbs that appear a cool metallic silver and have no timt of amber but when they light up they are amber.
|
aight cool thanks alot, but 1 more ?, what is the best silicone to get, b.c i was lookin at them and im not sure
there are alot out there and i just want the best before i do it |
when i did mine last weekend, i didn't really need new silicone because the stock stuff was still super sticky...but to be sure i just put on more bathroom clear silicone inside and around the lens....so far so good...no leaks and it's been like 4 strait days of rain...
|
i just went down to target and got some silicone in a cqueeze bottle i believe it was called Silicone II or somethin.
|
bigd6983: were did you find those bulbs that light up amber but have the silver loook........ i looked for these and couldn't find them?
|
I couldn't get it hot enough fast enough so i just tossed it in the oven at about 150-180 for about 5-10 min. (just be careful taking it out, ITS HOT!) this way all of the silicon was soft and it came apart easily. Also, I left most of the origional silicon in the gray part and tossed it back in the oven to soften it up before re-assembly, that way i just had to put some on the clear part and stick them together. They have been on for a little over a month now, and there have been no leaks or any moisture.
|
/\/\/\ the oven trick is a great idea..... just don't forget about it!!!
|
Molson (Jim) - Great instructions, I cleared 'em out no problem. Only thing is that the screw drivers and kinfe I used I think are forever ruined with GM silicon. Anyone know how to remove this poop? Turpintine maybe??
|
fire it's flamable
|
Quote:
|
Quote:
that'd be me, thank you very much. took me forever to right this how-to |
allright i have to reddo one of mine and im finally gettin arouond to it. I have a small hole in my silicone so theres precip gettin in do u think it will be more difficult or easier second time round. I USed Silicone II for caulking?
thanks bob |
Alright Alright, thanks sound_xtreme
|
you could probably put a nice layer of silicone on the outside of the seal. i usually do that now when i am clearing them anyways. put i use clear dunno if you do or not
|
| All times are GMT -4. The time now is 04:41 AM. |
Powered by vBulletin Version 3.6.0
Copyright ©2000 - 2025, Jelsoft Enterprises Ltd.