Interior Lighting Remodeling
Whelp... its about that time....
its something i've wanted to do for a while, since the wiring in there is just plain insanity(multiple colors, no rhyme or reason to where or how it goes anywhere..) but today, after work, i got into my car, started it up and my gauges were all dim, which was odd, since they usually light up quite nice. then smoke started pouring out of my center console. I don't know how or why, but i found my main power wire, heating up and melting the insulation off of itself, then heating up so much the solder joint broke. so..yeah. tomorrow morn, i'm tearing all the wiring out and redoing it all over the next few weeks. In a more logical manner this time.:dry: I'll post up here with how its coming along and how i'm doing it. kinda a step by step for the newbs to ask questions and get ideas. (even though we have 3 how tos for this already) |
Im a noob....:thumb: what kind of lighting this is??
|
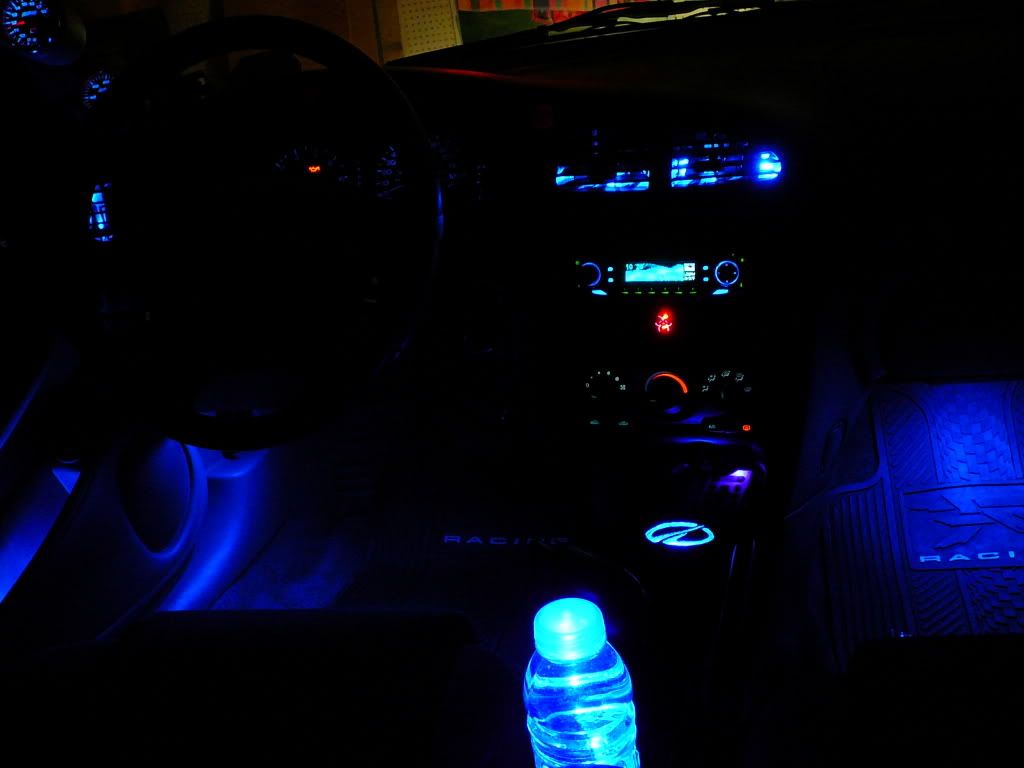
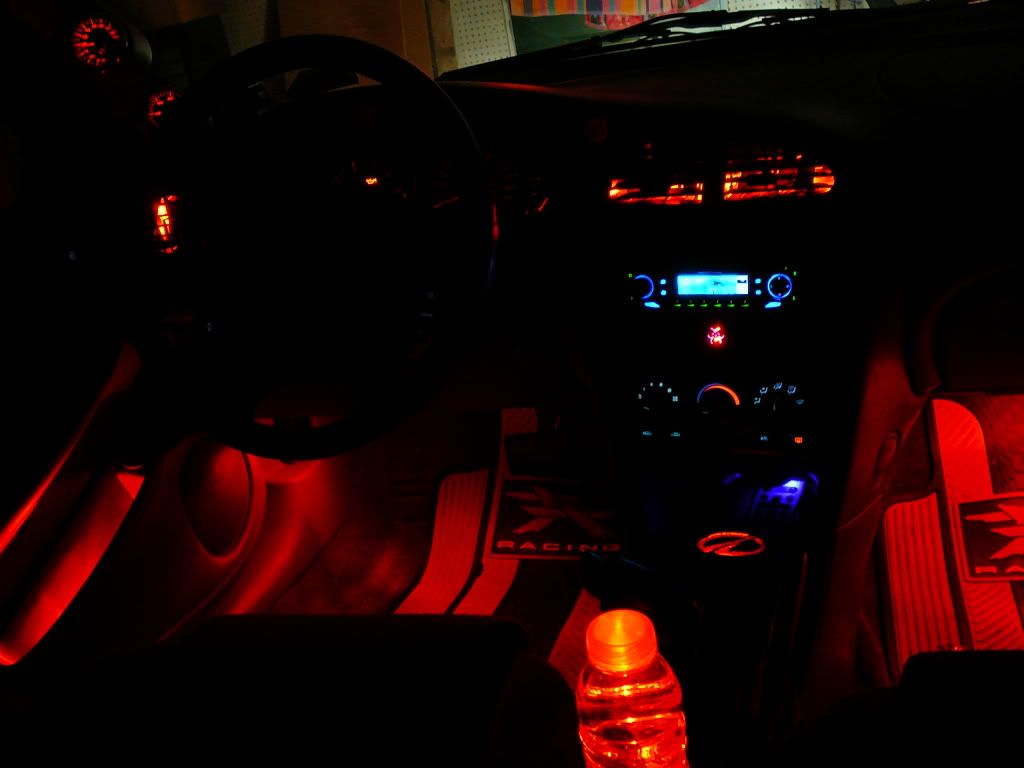
led, dual color. gauges, doors, vents, center console cubby, and floor lighting
|
ohhh ok...haynes manual have wiring diagrams and stuff...I dont know if that would help you out some
|
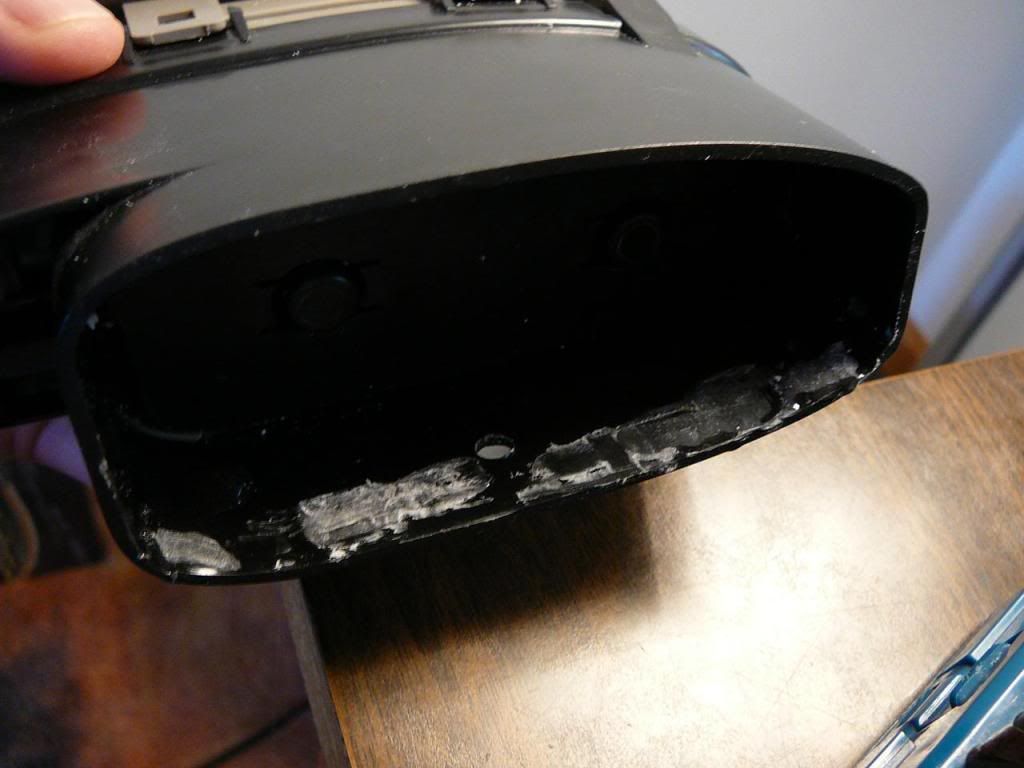
hahaha. this is what i currently have. (and am remodeling)
  a haynes manual would do me no good. :lol: |
WoW!...thats nice
|
cherry, i hope your remodeling those floormats :)
but seriously, keep us updated. you were one of the first (well since i joined) that really took off on the LED lighting scheme... |
i like the A/C lightin
how'd you do that and was it hard?? |
Quote:
:lol: i just wanted something red and black that wasn't plastic... they are some el-cheapos from walmart. and the project is more time consuming then difficult. there will be pics to follow in the next several days/weeks (depending on how much time/ambition i have) Update: Off to a good start. (the gauges might have to come out, again, too. but i sure hope not) and the doors will probably stay. the wiring on those isn't horrible, just needs to be recolored. I used whatever i had laying around. so for 2 lighting schemes, i had at least 5 different colored wires, red wire was being used for red/blue/power/ground. so yeah, it got confusing. Not to mention using 18ga wire for a single led. :banghead: laziness never helps w/ electrical work. 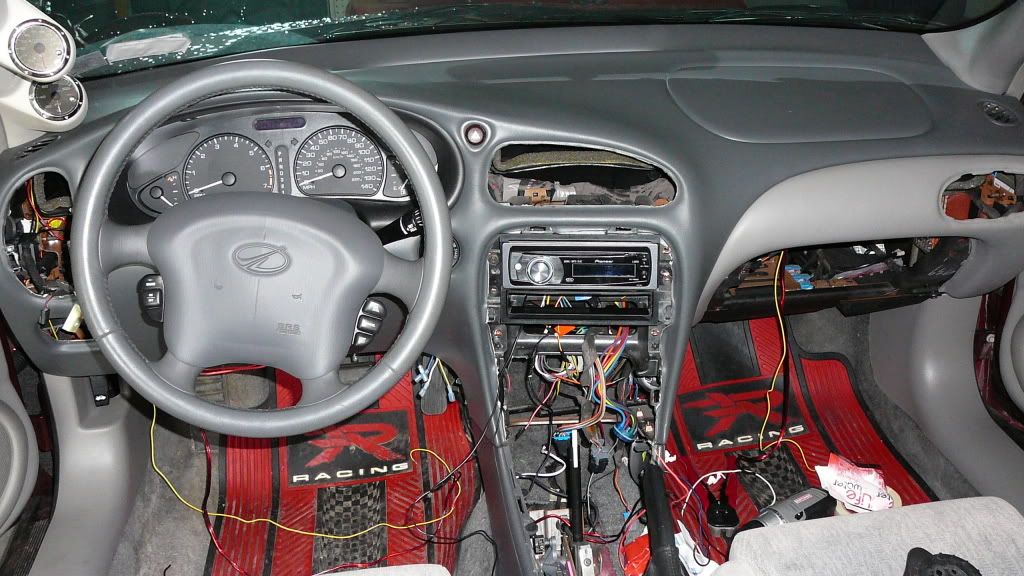 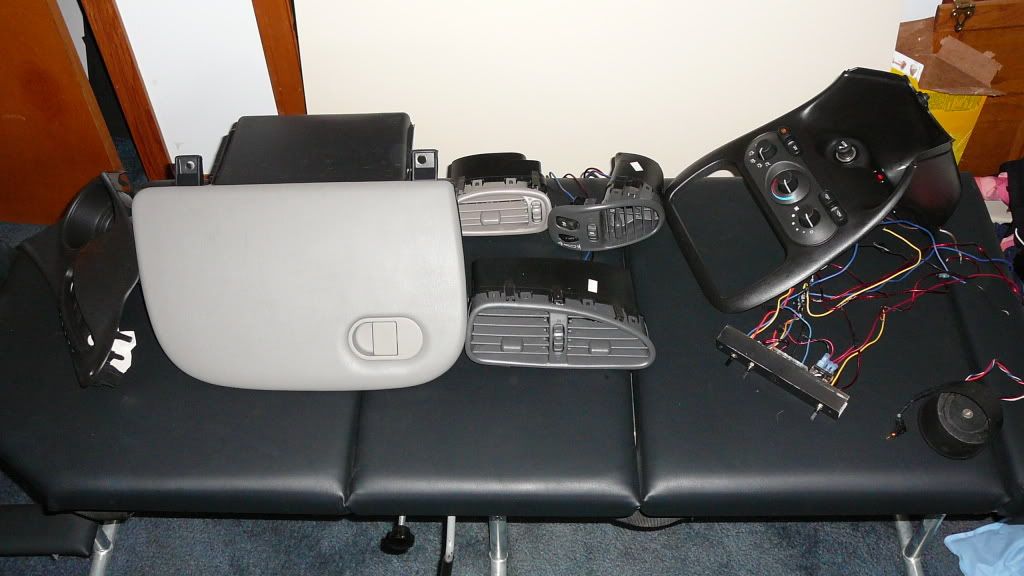 certainly doesn't take long to tear this stuff out... now i get to do the fun part of ripping it all apart and re-leding/rewiring in a logical manner. When i originally did this, i had very VERY little wiring experience, and its obvious. :lol: |
And i'm sticking to the same theme, just cleaning things up a little, and using 3mm leds i have laying around. (i also still have like 500 5mm blues w/ resistors if anyone wants some. $12 shipped per 100)
anyway... on with the project. Leds.. 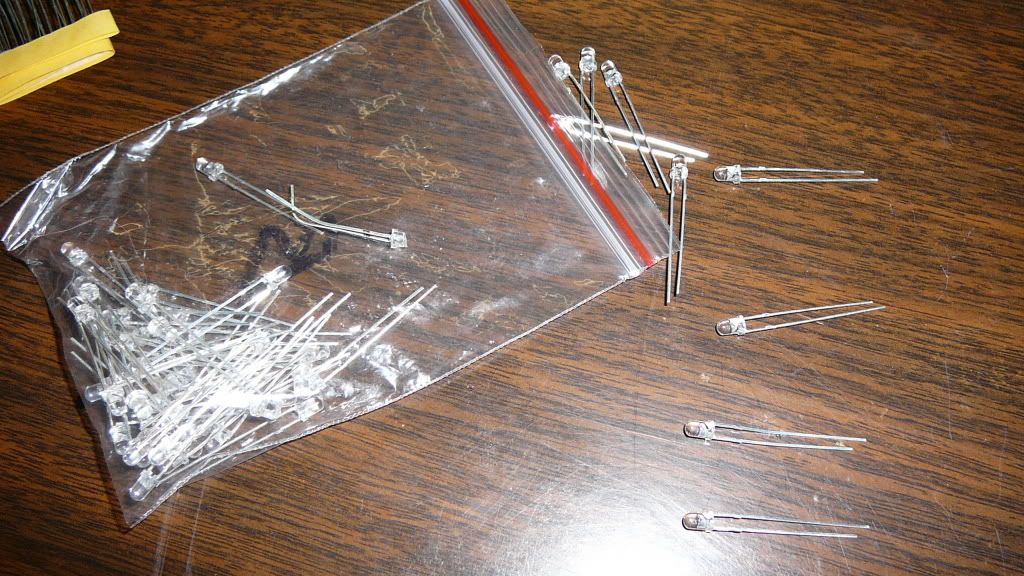 I did find out that with these little ones, the blues are at least 2x brighter then the reds. so i'll have 2 reds per blue (except for the cup holder, since that won't matter much) ----------- Illuminated Cup Holder ----------- Sand down the tip, and one side (just the tip of your doing one color, but i'm not) 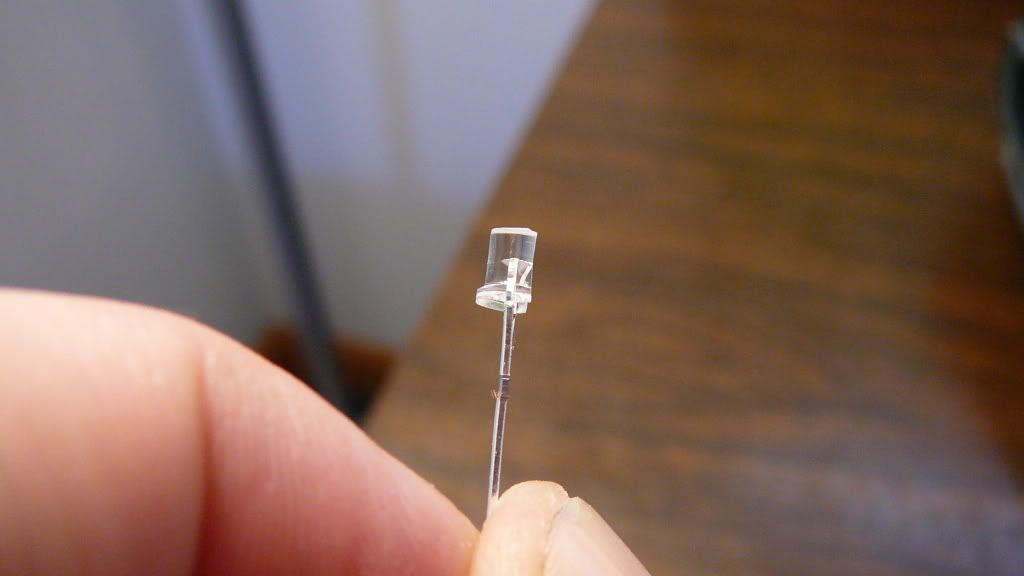 Epoxy in the middle, little hot glue on the top and bottom to hold it together It might not be pretty, but note the size. thats my index fingernail and thumbnail next to it. This will also be buried, so no-one will see. Lastly, the glue on top will be removed after the epoxy sets. The little bit on the bottom will insulate and prevent shorting/starting fires. :glare: 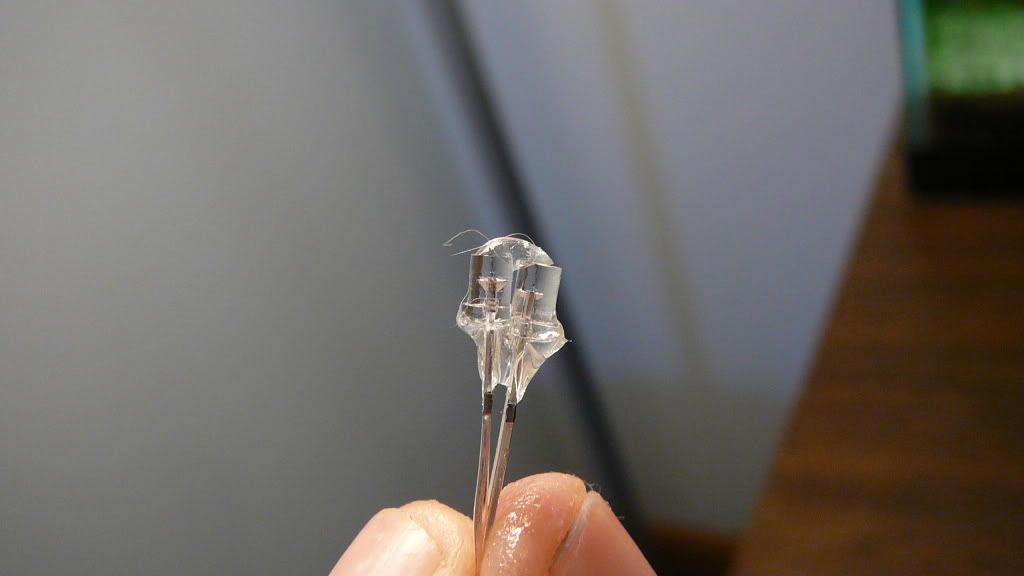 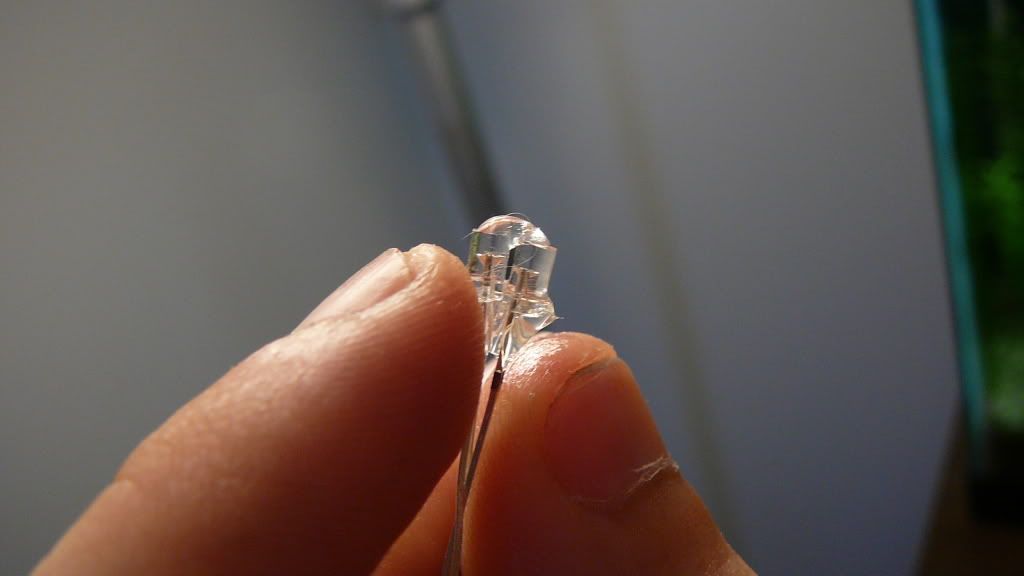 (24hr breakfast break... apparently) anywho... After adding your wires and a little hot glue around the base to seal them, and prevent them from shorting each other.. you get this... 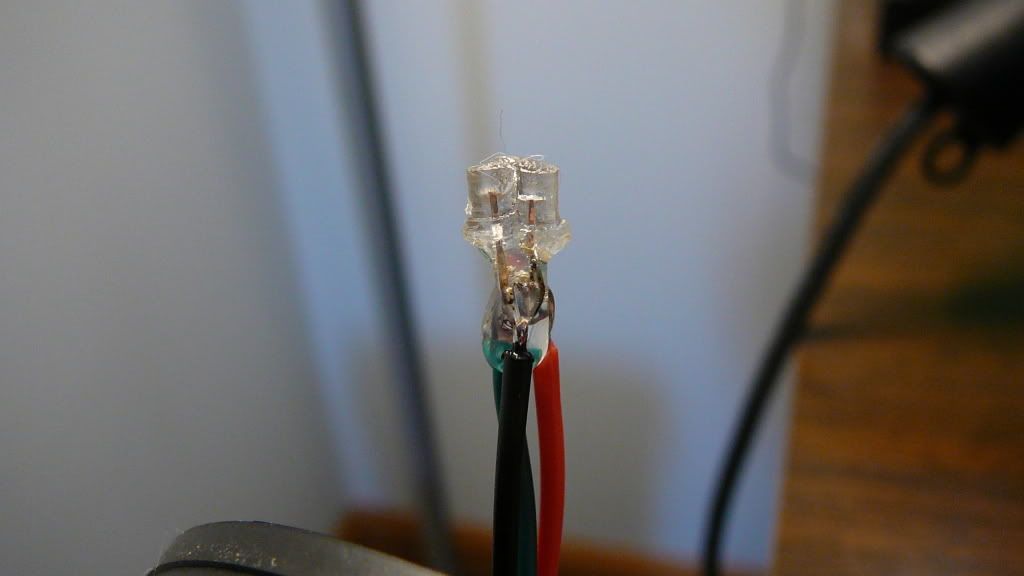 Now just thread your wires through the rubber base... 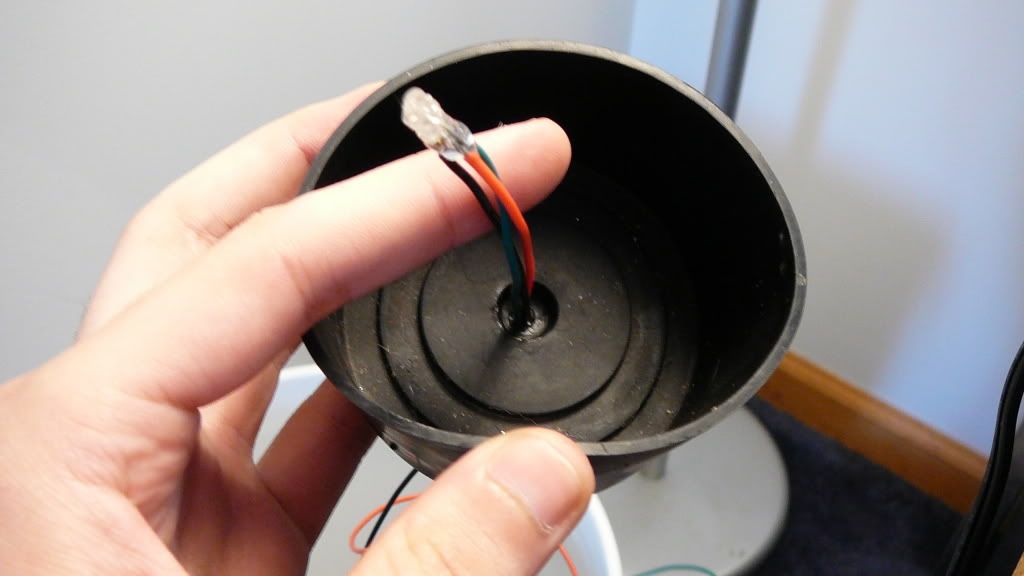 and... 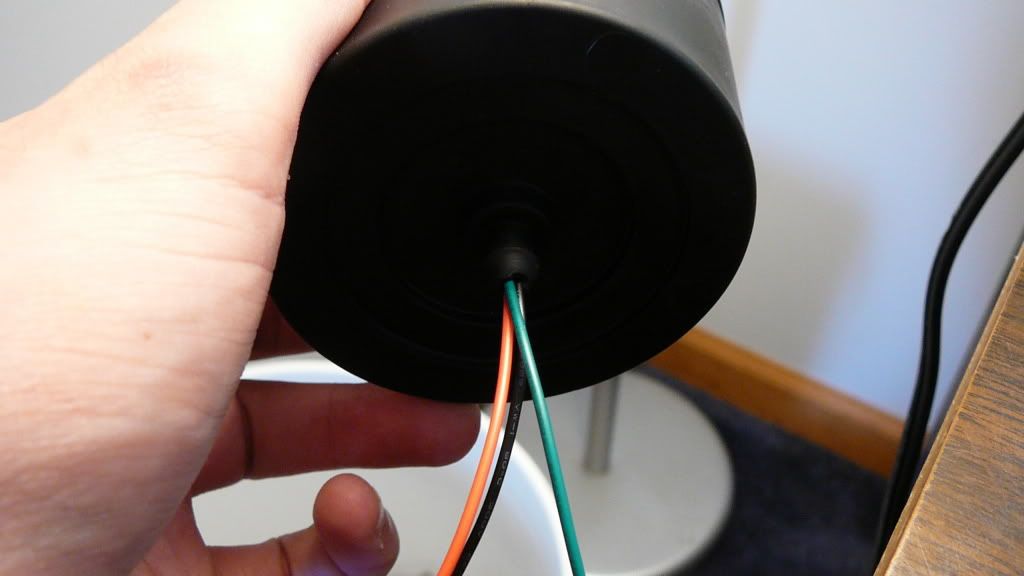 Now just add some epoxy and let it sit. (will seal it, water tight to prevent condensation from ruining the whole project)  Now just connect those wires to a switch, or whatever you want that'll power them and your all set. |
how much would you want for a couple of those 5mm blues?
i'd like to get some if you have some extras im also workin on my interior lightin so i appreciate the step by steps on the cup holder! |
I sell them for $12 shipped, per 100. they come with resistors.
|
Nothin worse than a short that comes out of no where and you have no idea where it is. Jeez, good luck with it.
On another note, I Really like how you make those multicolored LEDs.. never thought of gluing them together to, how all intensive purposes, end up with one. Cool stuff dude! |
double posted.. nuke this.
|
Lookin' forward to seeing the finished product, the man does great work!
|
sexy i did alil of it but i pulled them all out
|
awesome stuff i'll get this on a how to soon. you are awesome at close up shots
|
One thing to remember... when doing these projects ALWAYS TRIPLE CHECK YOUR POLARITY!
the cupholder project i did above, i just had to REDO because i had them backwards. it sucks to have to demolish the whole thing, just to redo it, on the account of personal stupidity. :glare: |
Since I already did a vent HOW TO, i'll just add these pics, for a sort of photo version. The method still applies, i just cleaned it up some.(and am using 3mm leds, instead of 5mm)
 Back of the vent. The white is epoxy from where the old ones were mounted. I dremeled it some just so it was flat. I also filled that old hole in with epoxy. (hence the tape underneath it, that you'll see later) Back of the vent. The white is epoxy from where the old ones were mounted. I dremeled it some just so it was flat. I also filled that old hole in with epoxy. (hence the tape underneath it, that you'll see later)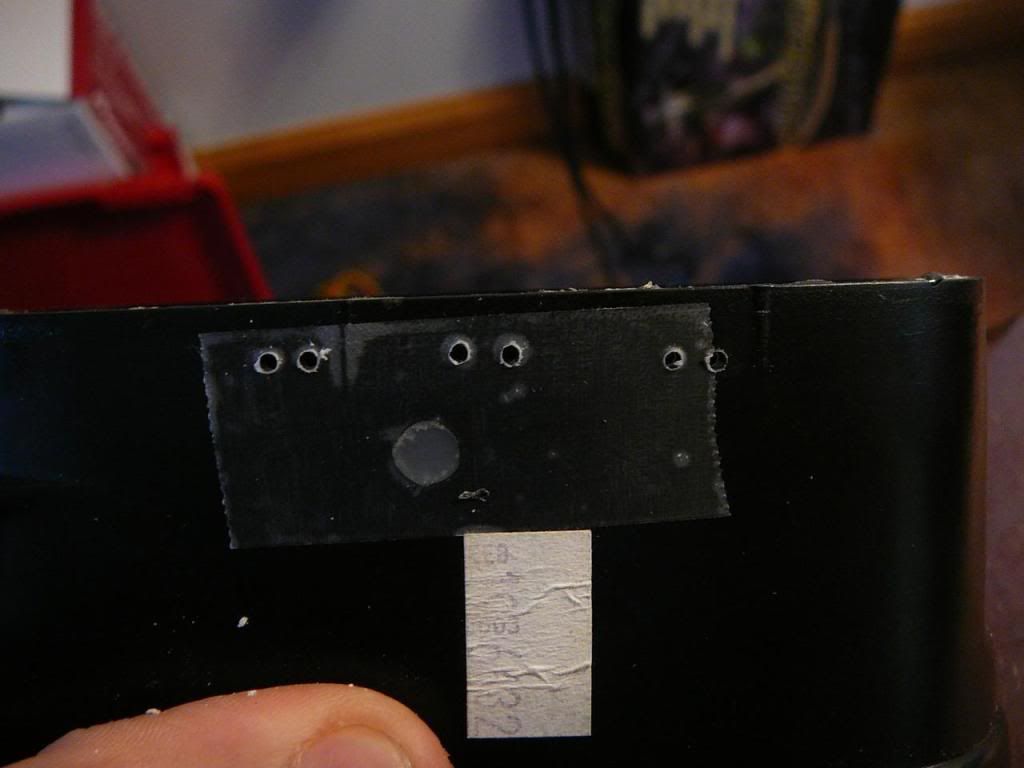 6 Small holes for the led Leads... 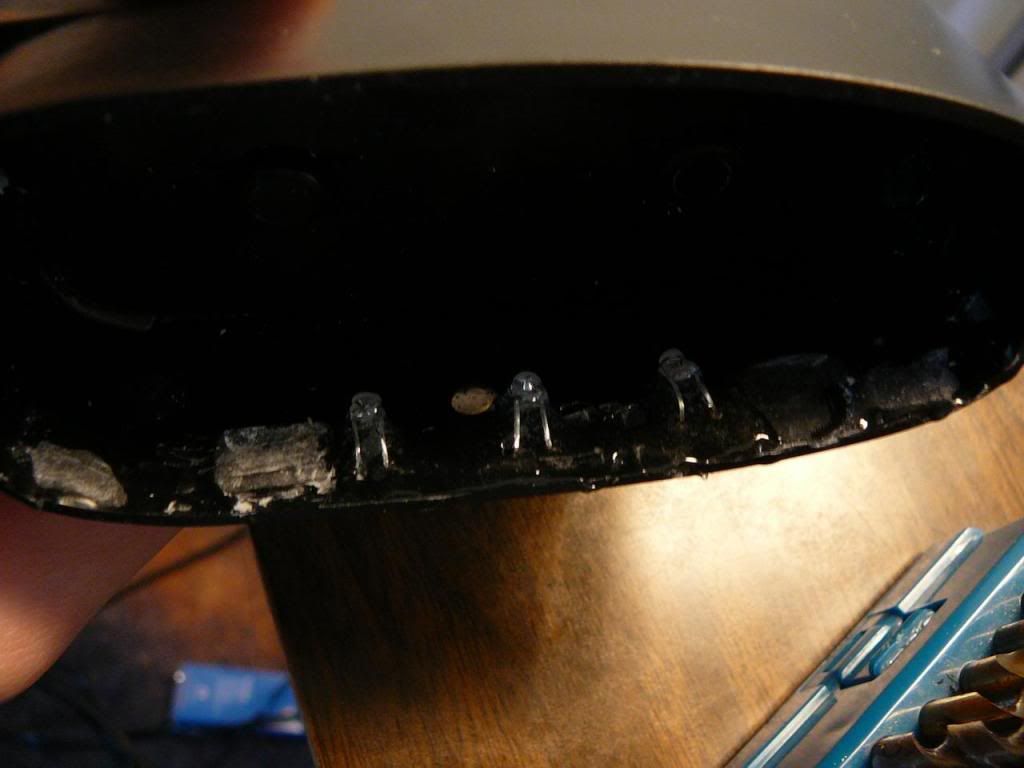 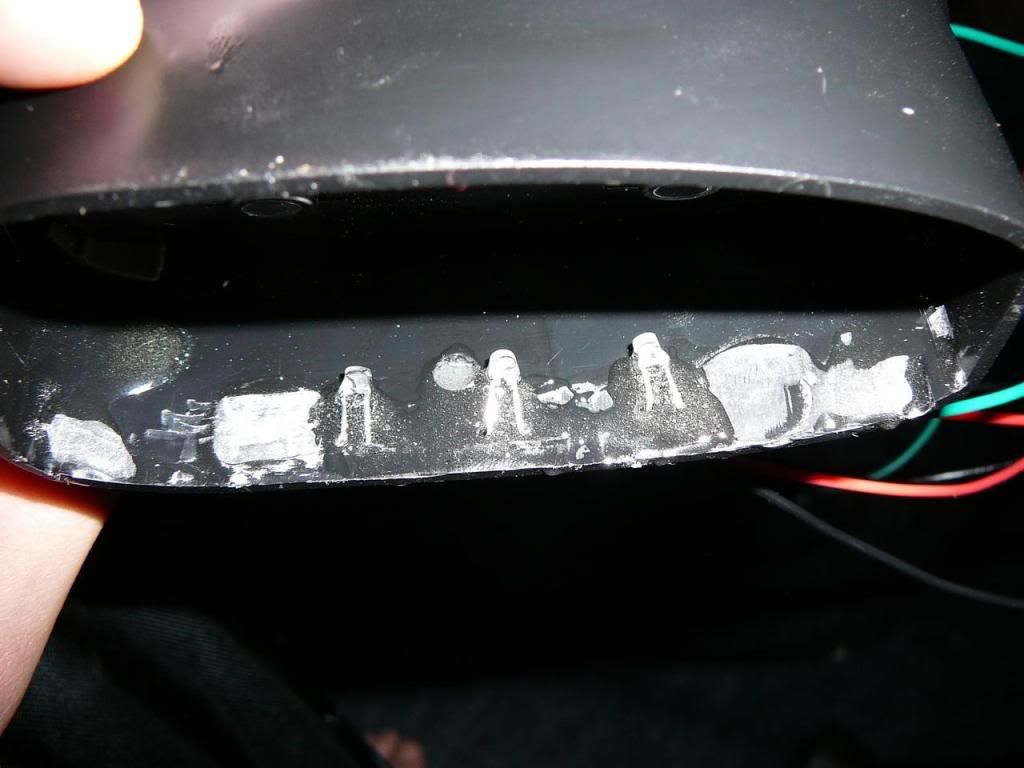 Leds in place, and epoxied. (mounting kinda is self explanatory) 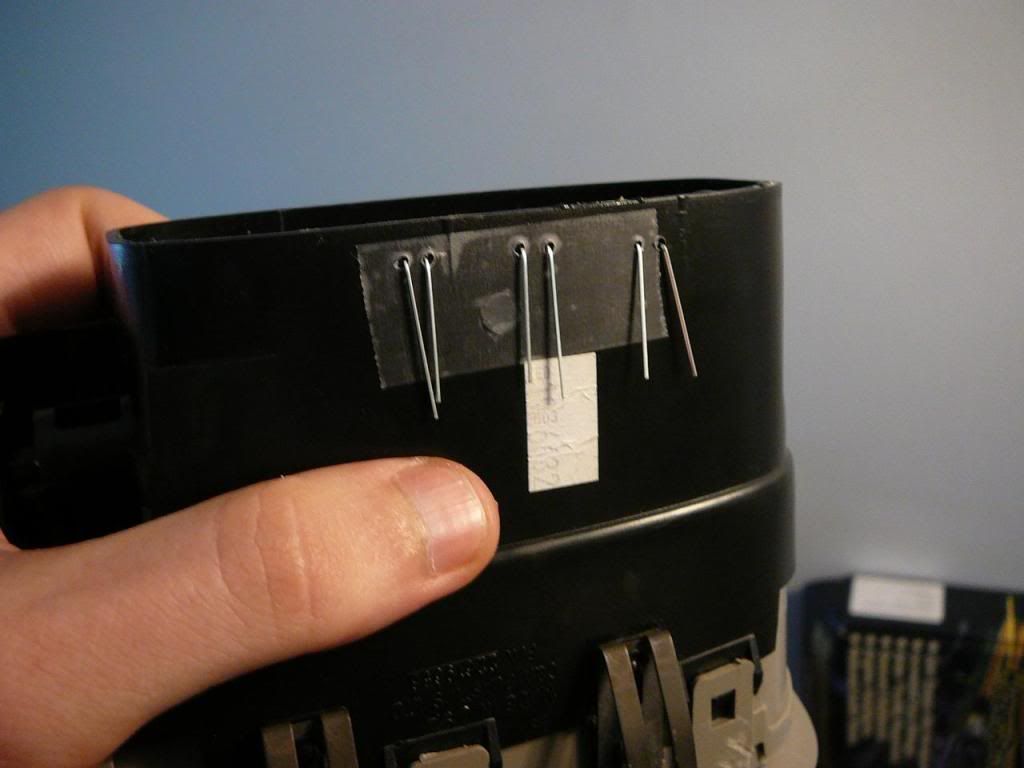 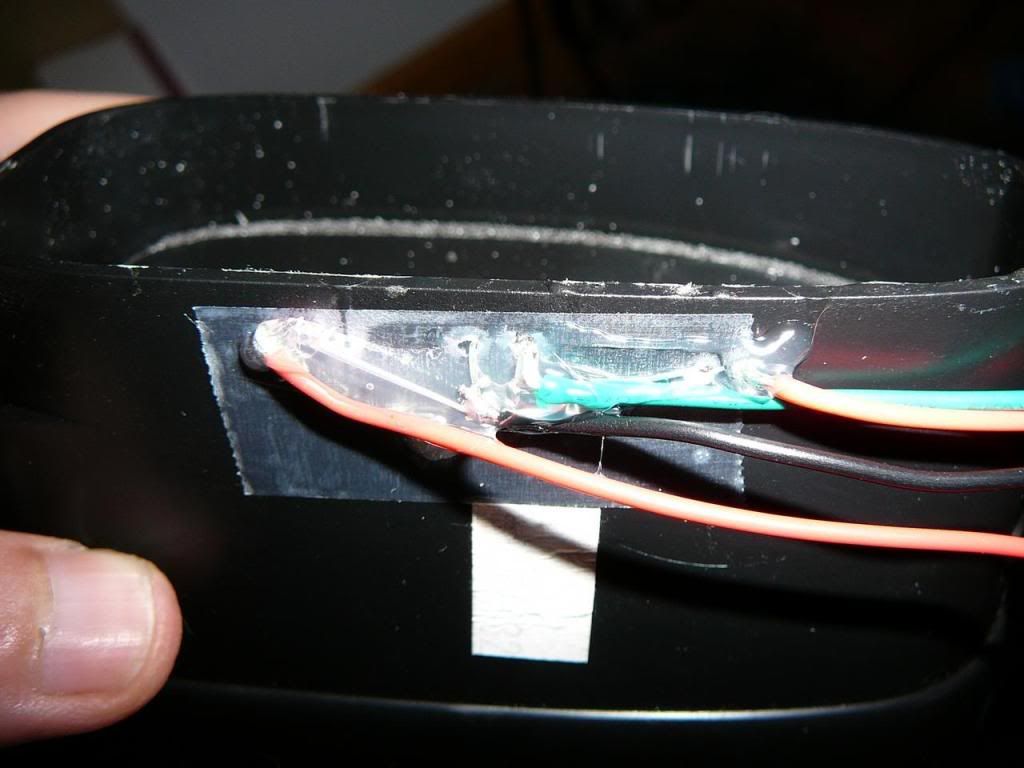 Wiring, after the fact. Common grounds make life simple. Then just a power wires for the 2 reds and single blue. 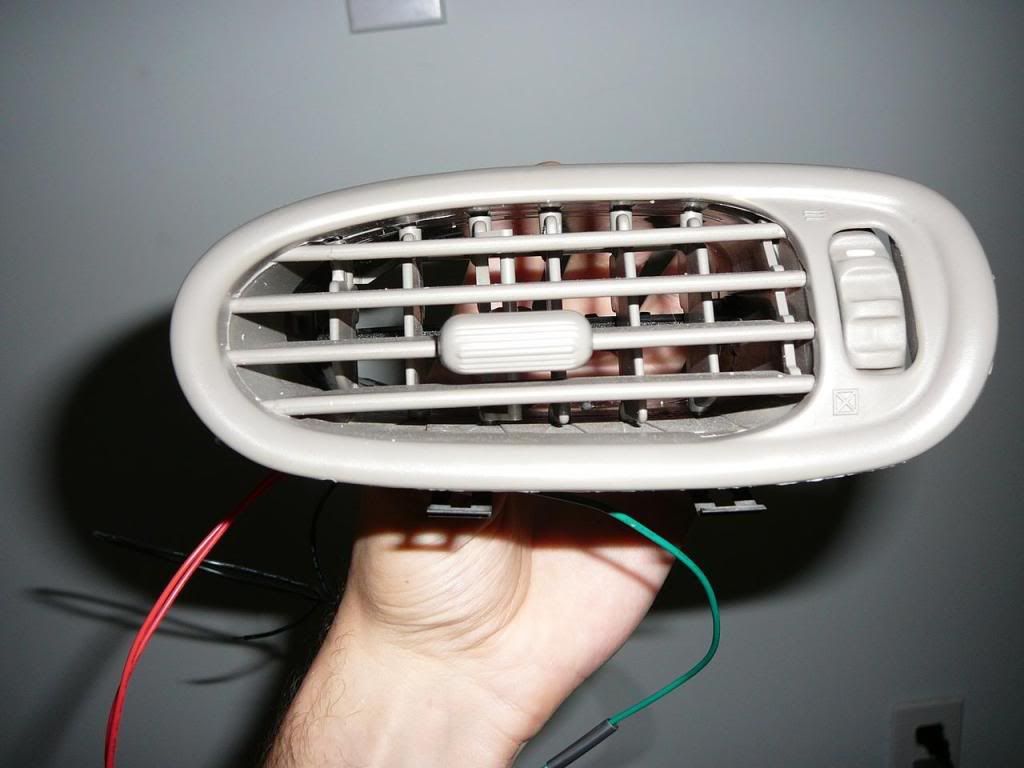 Vent Before Lighting (can barely see the leds in there) 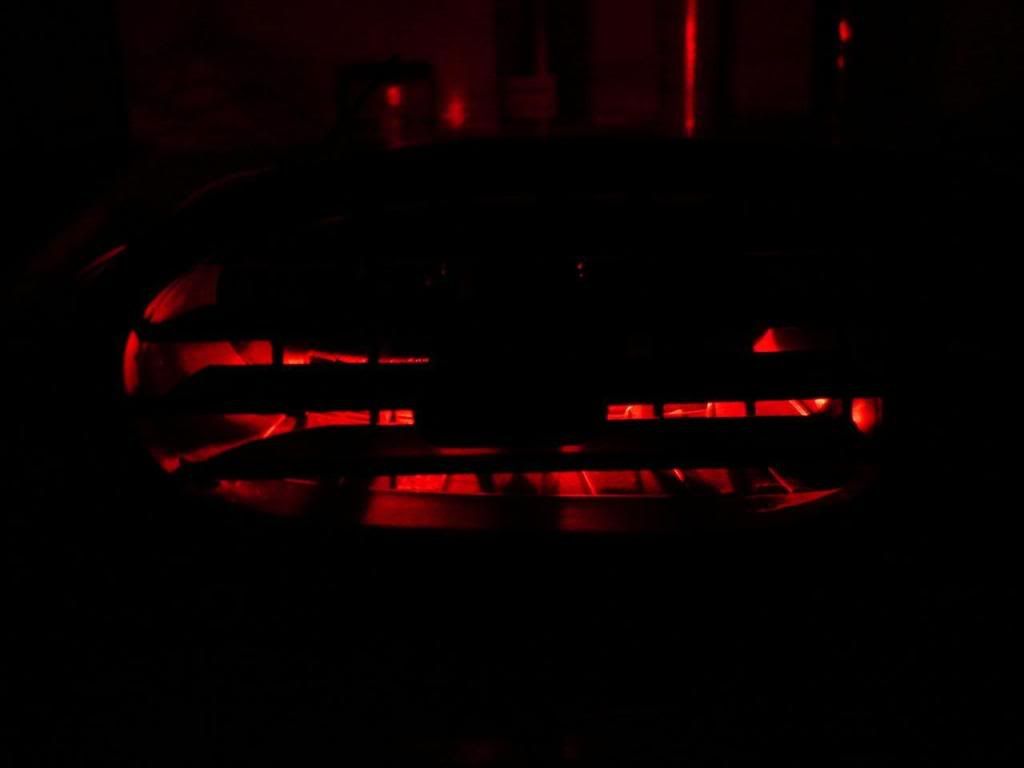 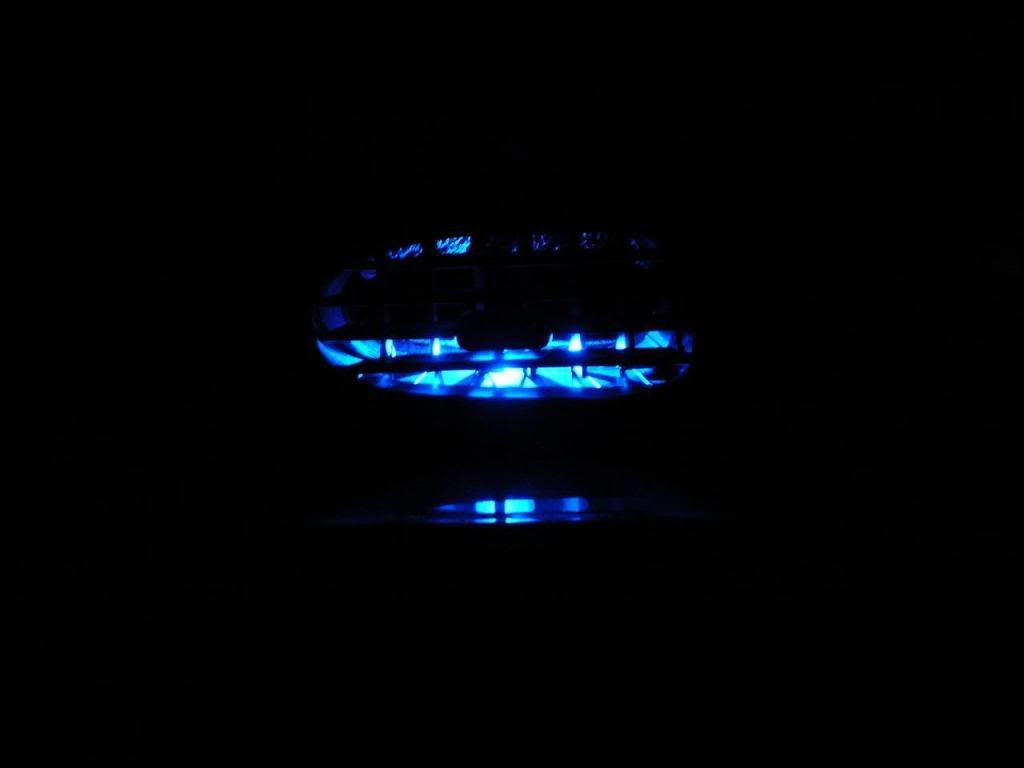 After. Its got a nice subtle glow now. Before, it was kinda bright, espicially when it was really dark at night. So I wanted to go a little more dim. and the ever popular tyedye shots. (both red and blue on) Hopefully, it'll never look like this, but incase anyone is interested... here ya go. 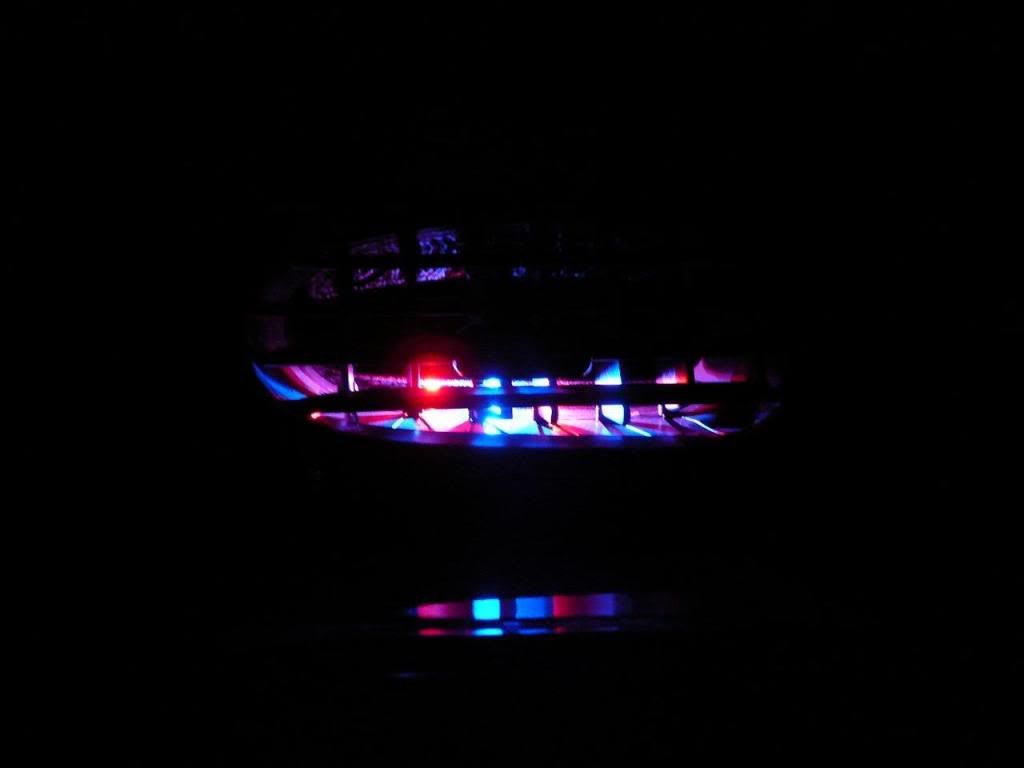 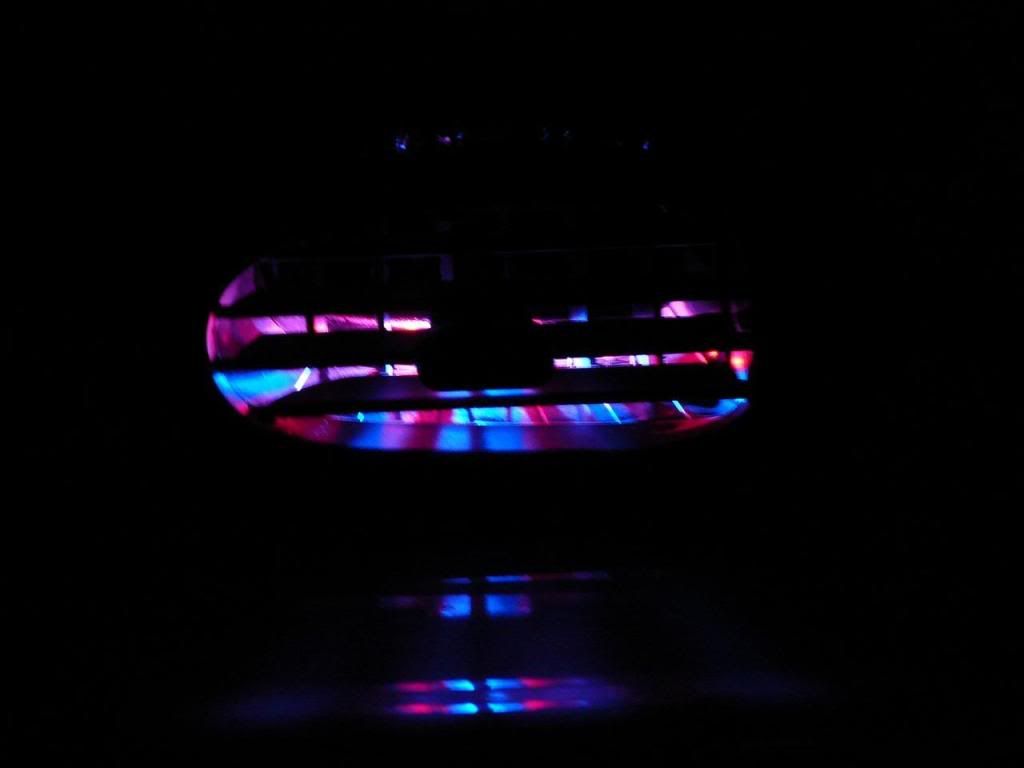 and ion, my dad has multiple fishtanks, so he got a camera with a good macrozoom. that thing takes AWESOME close shots. (and i personally hate when people post blurry ones) :lol: |
Quote:
like when you put 65 leds in for a third brake light. sounds like a good idea till you get a short :rolleyes2:. then its a nightmare. :lol: cherrington17: going to make glow needles for those gauges ? ;) |
| All times are GMT -4. The time now is 10:04 AM. |
Powered by vBulletin Version 3.6.0
Copyright ©2000 - 2025, Jelsoft Enterprises Ltd.