Since i've had several requests to explain this, i'll write up an easy "how to" for wiring Led's. This will just be how to run power to get them lit.
Not how to run them in parallel for specific voltages. (if someone wants to add that part to the how to, feel free to do so. just please use pics for every step. make it as easy as possible! ) The model i'm doing, i'm using a 3 Volt power supply. Obviously automotive applications have 12 Volt. This is why most leds are sold with resistors. you need to solder that resistor to either of the led terminals and that makes it work on a 12 Volt power, in series. Step One. 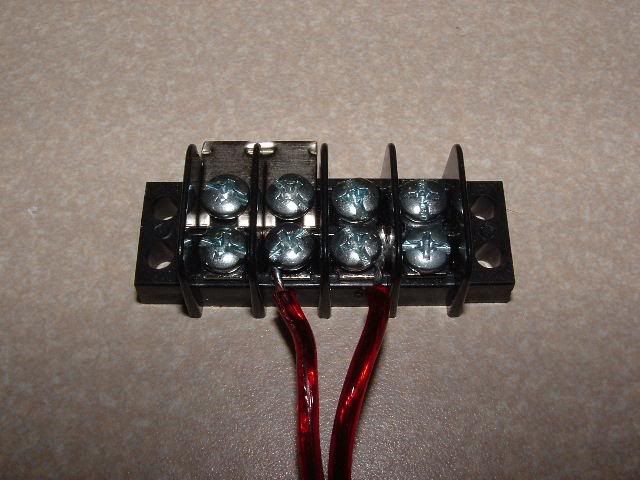 In the picture, i have what is called a "terminal block" it has 4 terminals, 2 screws on each one. 1|2|3|4 5|6|7|8 The metal piece in the back left is connecting screws 1 and 2. This gives them both the same voltage. So as pictured, screws 1;2;5;6 will all have the same voltage. As with 3;4 and 7;8. This is NOT true for screws 4;7 or 3;8. They are not connected, so they will not have the same voltage. I have connected the + lead of the led onto screw 6 and the negative of the Led onto screw 7 |
Pure genious! Thanks!!! I can see where you're going with this... and yes, it is definately simplified!
|
Step 2.
Now connect your power supply. This will be a Power wire in your car. The easiest place to get that is from the fuse box on either side of the car. I'd suggest consulting the manual and picking one that is NOT that important to proper car function (in case you blow that fuse) Picture 2 is the image of my make shift power supply. 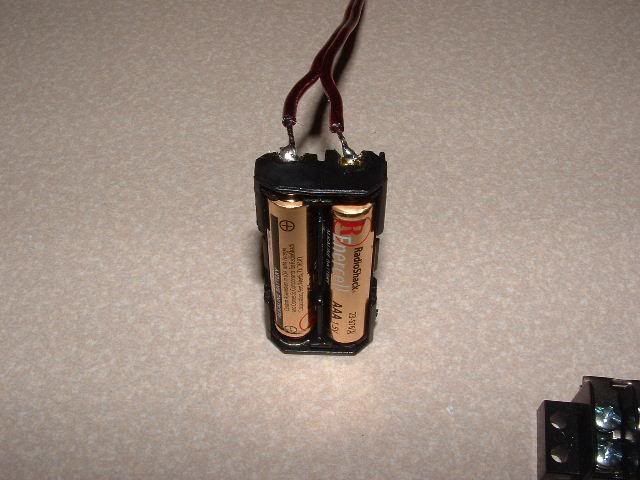 |
Step 3.
Connect your power supply to the terminal block. 1|2|3|4 5|6|7|8 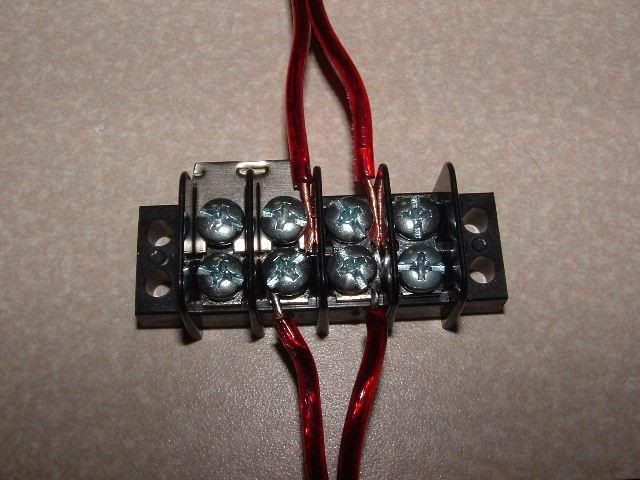 Since screws 1;5 and 2;6 are "jumpered" together, you can connect power to either screw 1 or 2 and the voltage will get to screw 5 and 6. This makes thing easier when your using more then one led. Also in this picture, i have my ground wire inserted under screw 3. This is the ONLY place this wire can go, since screw 3 and 4 are isolated from each other. The only way the voltage can return from screw 7 is directly to screw 3 and thats all. (w/ this "basic" setup, the power and ground both come from the power supply. In your car, the power will come from the fuses [connected to the battery] and a ground will be any place on the structural metal of the car) Personally, i used a good sized bolt under the center console as a ground. I just unscrewed it a bit, put a wire under it and tightened it back down really good. |
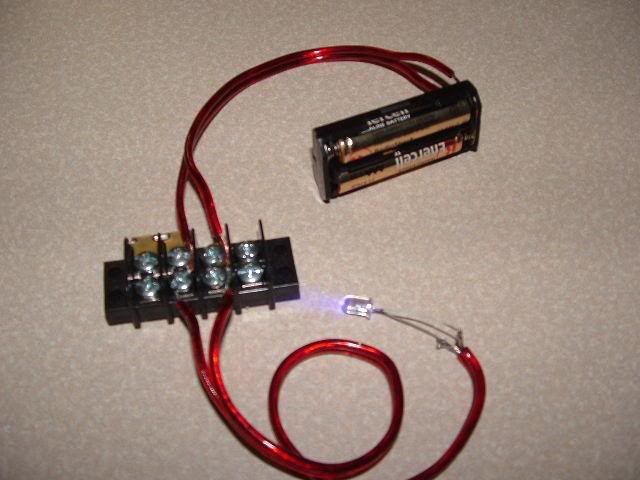
That should be all you need to connect power and ground to a LED. The last image is of the complete setup. Very easy to do.
 |
if you hook up the distributor to a steady 3V power supply (use a resistor and then draw power from the car...), you can mount multiple LED's on the same distributor...
|
i haven't tried it, but in theory it would work. (as long as all the led's on that distribution were the same.
putting the resistor on the power, coming into the block.... hmm... never really thought of that. lol. |
dremelled led tip....
for the members that wonder "how far" to sand them.... just need to get rid of the "cone" top... 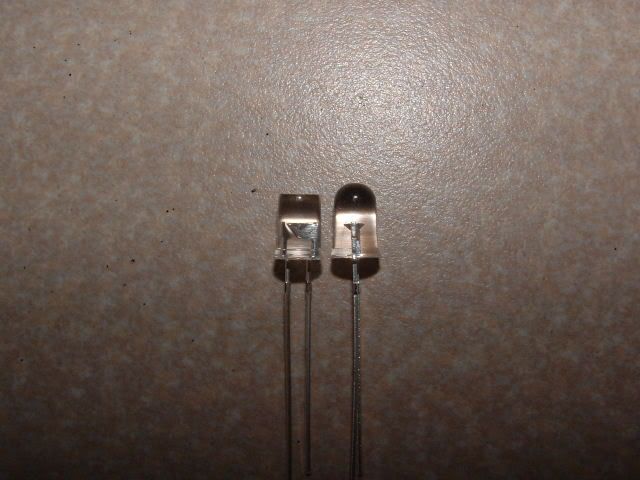 |
http://led.linear1.org/led.wiz found to help alot if needed more info on resistor sizes etc.
or http://metku.net/index.html?sect=view&n=1&...dcalc/index_eng |
Quote:
and for the members that wonder why you sand em? :D Will it spread the light or focus it? |
spread light. the cone keeps a focused beam, which is what you want to remove.
|
here is a good calulator that I use:
led calulator  hint : if you run the leds like this (in series) and use 12 V and (6) 2v leds no resistor is needed. but you can only "chain" 6 leds in a group. |
does it matter what size/type(diffused/wide angle/etc) i get if im going to sand them down anyway? and what is water clear?
im looking at this store http://search.stores.ebay.com/Wellton-Superbright-Led-Store_green-led_W0QQfcdZ2QQfromZR10QQfrtsZ0QQfsubZ3030796QQfts Z1QQsaselZ243256314QQsofpZ0 i need to stay below $11 bc thats all i have in my paypal and i dont want to wait another week to transfer more haha |
^didn't really go anywhere specific, for leds. just the general store.
its hard to say when to sand and when not to, when your talking about those. i used a bathroom here as a test "lab" since one we have has no windows and can be completely dark (w/ a power outlet) mock mount them w/ some tape, and connect a basic 12V power source to them (w/ a resistor of course) and see how they look. If its like a flashlight beam, then sand... if it makes the whole object glow, then don't sand. unless your looking for a certain look... then just do whatever. :lol: |
Quote:
I just want to make sure I understand this properly: I understand that 3:7 are connected, but would 7 be your ground under the dash or 3? |
Quote:
Ah...I see... |
3 and 7 are your grounds(plural)
|
Quote:
why..yes... yes they are. :huh: i'm confused as to why you added this comment... but it doesn't really matter. Quote:
i know 'nigma isn't on the board anymore... but it IS possible to do this, however, all resistors have a total Wattage they can supply. (most are 1/8,1/4,1/2W) so... you can only run a few off of a line like this. Just remember, if you are going to try doing leds this way... V*A=W |
How do you direct connect to an LED bulb? Such as one from superbrightleds.com. I bought an extra and wanted to do the cupholder one but don't know how to wire them unless the bulb goes in a stock socket.
Nevermind, I have a 194 replacement so I'm sure that can't be direct wired. |
| All times are GMT -4. The time now is 06:37 PM. |
Powered by vBulletin Version 3.6.0
Copyright ©2000 - 2025, Jelsoft Enterprises Ltd.